
The Vegan Chicken Kiev
The (Vegan) Chicken Kiev. A dish full of nostalgia and liquid magma butter that can burn your face off. Here’s how to recreate it, nostalgia and magma butter included.
As always, if you dig this recipe, tag me at @draggedthroughthegarden on instagram and we can talk how many times we’ve burnt our tastebuds off.
The Vegan Chicken Kiev. Oozing with butter and nostalgia.
THE VEGAN CHICKEN KIEV
prep time: 60 minutes
cook time: 120 minutes
So this recipe is kind of tedious and time-consuming but that’s the price you pay for not buying them out of the frozen section.
This recipe requires you to make seitan, compound butter and stick one of those things inside the other thing. Then steam the seitan. Then fry the ever-loving shit out of it. And then bake it. And then eat it.
To start, you’re going to make your compound butter.
What you’ll need:
vegan butter
olive oil
garlic
chives
parsley
salt
pepper
lemon
Rinse off your chives and parsley. Chop them up as fine as you can and set them aside for a minute. In a bowl, add half a cup of butter at least. Put it in the microwave for ten seconds tops to soften it a little bit. It’s very important that the butter doesn’t liquify. Now that you have a mountain of butter in a bowl, add your diced parsley and chives. Add salt and pepper to taste. Squeeze some lemon in there for acidity. Mince up as much garlic as you want and toss that in there too. Give everything a thorough stir.

You should end up with something like this.
Next, you’re going to get out some saran wrap and lay it out on your counter. You’re going to take this big, beautiful bowl of butter and put it on the saran wrap. Then you are going to form the butter into a cylindrical shape.

Like so.
When all your butter is laid out in the above fashion, take the saran wrap and twist that thang up as tight as you can. This is going to go into the freezer for now to solidify in this shape.

Like this!
Now leave that rod of butter in the freezer for now.
Next, you’re going to put your seitan together. This requires you to combine a wet mixture with a dry mixture. You’re also going to use a lot of seasoning to make sure the flavors all carry over. You’re also going to build the wet mixture directly in the food processor.
What you’ll need:
vital wheat gluten
flour
chickpeas
vegetable broth
liquid smoke
salt
pepper
onion powder
garlic powder
stone ground mustard
tomato paste
smoked paprika
In your food processor, add a can of chickpeas. Add some of the liquid (aquafaba) from the chickpeas too. Add a tablespoon of stone ground mustard and a tablespoon of tomato paste. Next, add a tablespoon of all of the aforementioned seasonings up there.

Here’s what it looks like before you add the broth.
Now add a cup of broth into the processor and pulse until smooth. If there’s room in the food processor, you can add a little extra broth just in case the dry mixture misbehaves later. I’ll explain when we get there.
In a large bowl, add one and a half cups of vital wheat gluten and a quarter cup of flour. I used all-purpose but you can probably get away with your flour of choice. I also added a little bit of each of the seasonings into the dry mixture too, just to be safe.

Now as you can assume, the wet one will be mixed in with the dry one!
Slowly mix the wet mixture in with the dry one and stir as you go. It will turn into a large unattractive doughy ball. If it’s too dry, add a little bit more wet mixture. If it’s too wet and goopy, add a little more of the dry mixture.
Once the big ball of dough is not dry or goopy, slap that bad boy on the counter and knead it out for two or three minutes.

This doesn’t look like Kiev at all!
Once your big ball of gluten is kneaded out, separate it into three or four smaller versions of itself. Then one at a time, you are going to put saran wrap on top of the seitan and roll it out to flatten it as much as possible. Repeat until you are out of seitan.

Now you have this long boy.
Next, you’re going to take that butter rod you created earlier out of the fridge. For this next part, you’re going to wrap the butter up with each of the flattened piles of seitan. Put the wrapped butter rod on a cutting board and cut it into segments. One segment for each pile of seitan.

Now roll it up!
The seitan should be doughy enough to form a complete seal around the butter so nothing leaks out until it’s supposed to. After you roll each one up in seitan, take the saran wrap and roll them all up as if they were small burritos. Put them in the freezer while you start the next part. You want them to stay in that shape without coming apart, so the freezer will help solidify them. I would say give them about 30-45 minutes in the freezer. You can use this time to clean up that mess you made.
I also realize this upcoming series of steps is tedious but trial and error led me here.
Next, you are going to steam the seitan after they’ve been in the freezer. This is to make sure they aren’t all rubbery and gross when you finish them. I’m also going to refer to them as kievs now.

Happy little kievs, ready for steaming.
Unwrap the kievs from the saran wrap. Make sure that the sides are sealed shut so the butter doesn’t leak out everywhere. Now you’re going to wrap them in foil to place them into your steaming vessel. If you’re using a pot with a steamer attachment, boil some water in there, attach the steamer thing and add your kievs. Steam them for 35 minutes.
After they’re done steaming, take them out put them in the fridge while you get the next part going.
Next, you’re to coat, batter and fry the kievs up. This will require you to coat them in flour, then in a wet batter and then in bread crumbs.
What you’ll need:
flour
oat milk
apple cider vinegar
salt
pepper
garlic powder
onion powder
bread crumbs

From left to right: crumb & seasoning, flour & seasoning, wet batter.
Like the visual above provides, you’re going to take need three bowls. One will host flour and a tablespoon each of the aforementioned seasonings. The second bowl, oat milk and a tablespoon of apple cider vinegar. The third, breadcrumbs and a tablespoon of the aforementioned seasonings. I wasn’t kidding when I said we would make sure those flavors get through.
Now preheat your oven to 350°.
In a pot or pan with high walls, add oil and bring the heat up to a medium flame.
You’re going to dredge each kiev in flour, then wet batter and then bread crumbs. After each time you do this, toss it in the oil and cook it on each side until golden brown. Should take about two minutes on each side. Maybe three, use your best judgement.

Look how perfect they look.
Next, the final step of this long process - baking the kievs. Lay down some parchment paper on a baking sheet. Put the kievs on there and bake them for 45 minutes. I, again, realize this process is long but trial and error led me to this conclusion.
After your 45 minutes is up, pop them out of the oven and let them cool for a few minutes. You’re probably going to burn your tongue no matter what so just try to enjoy yourself.
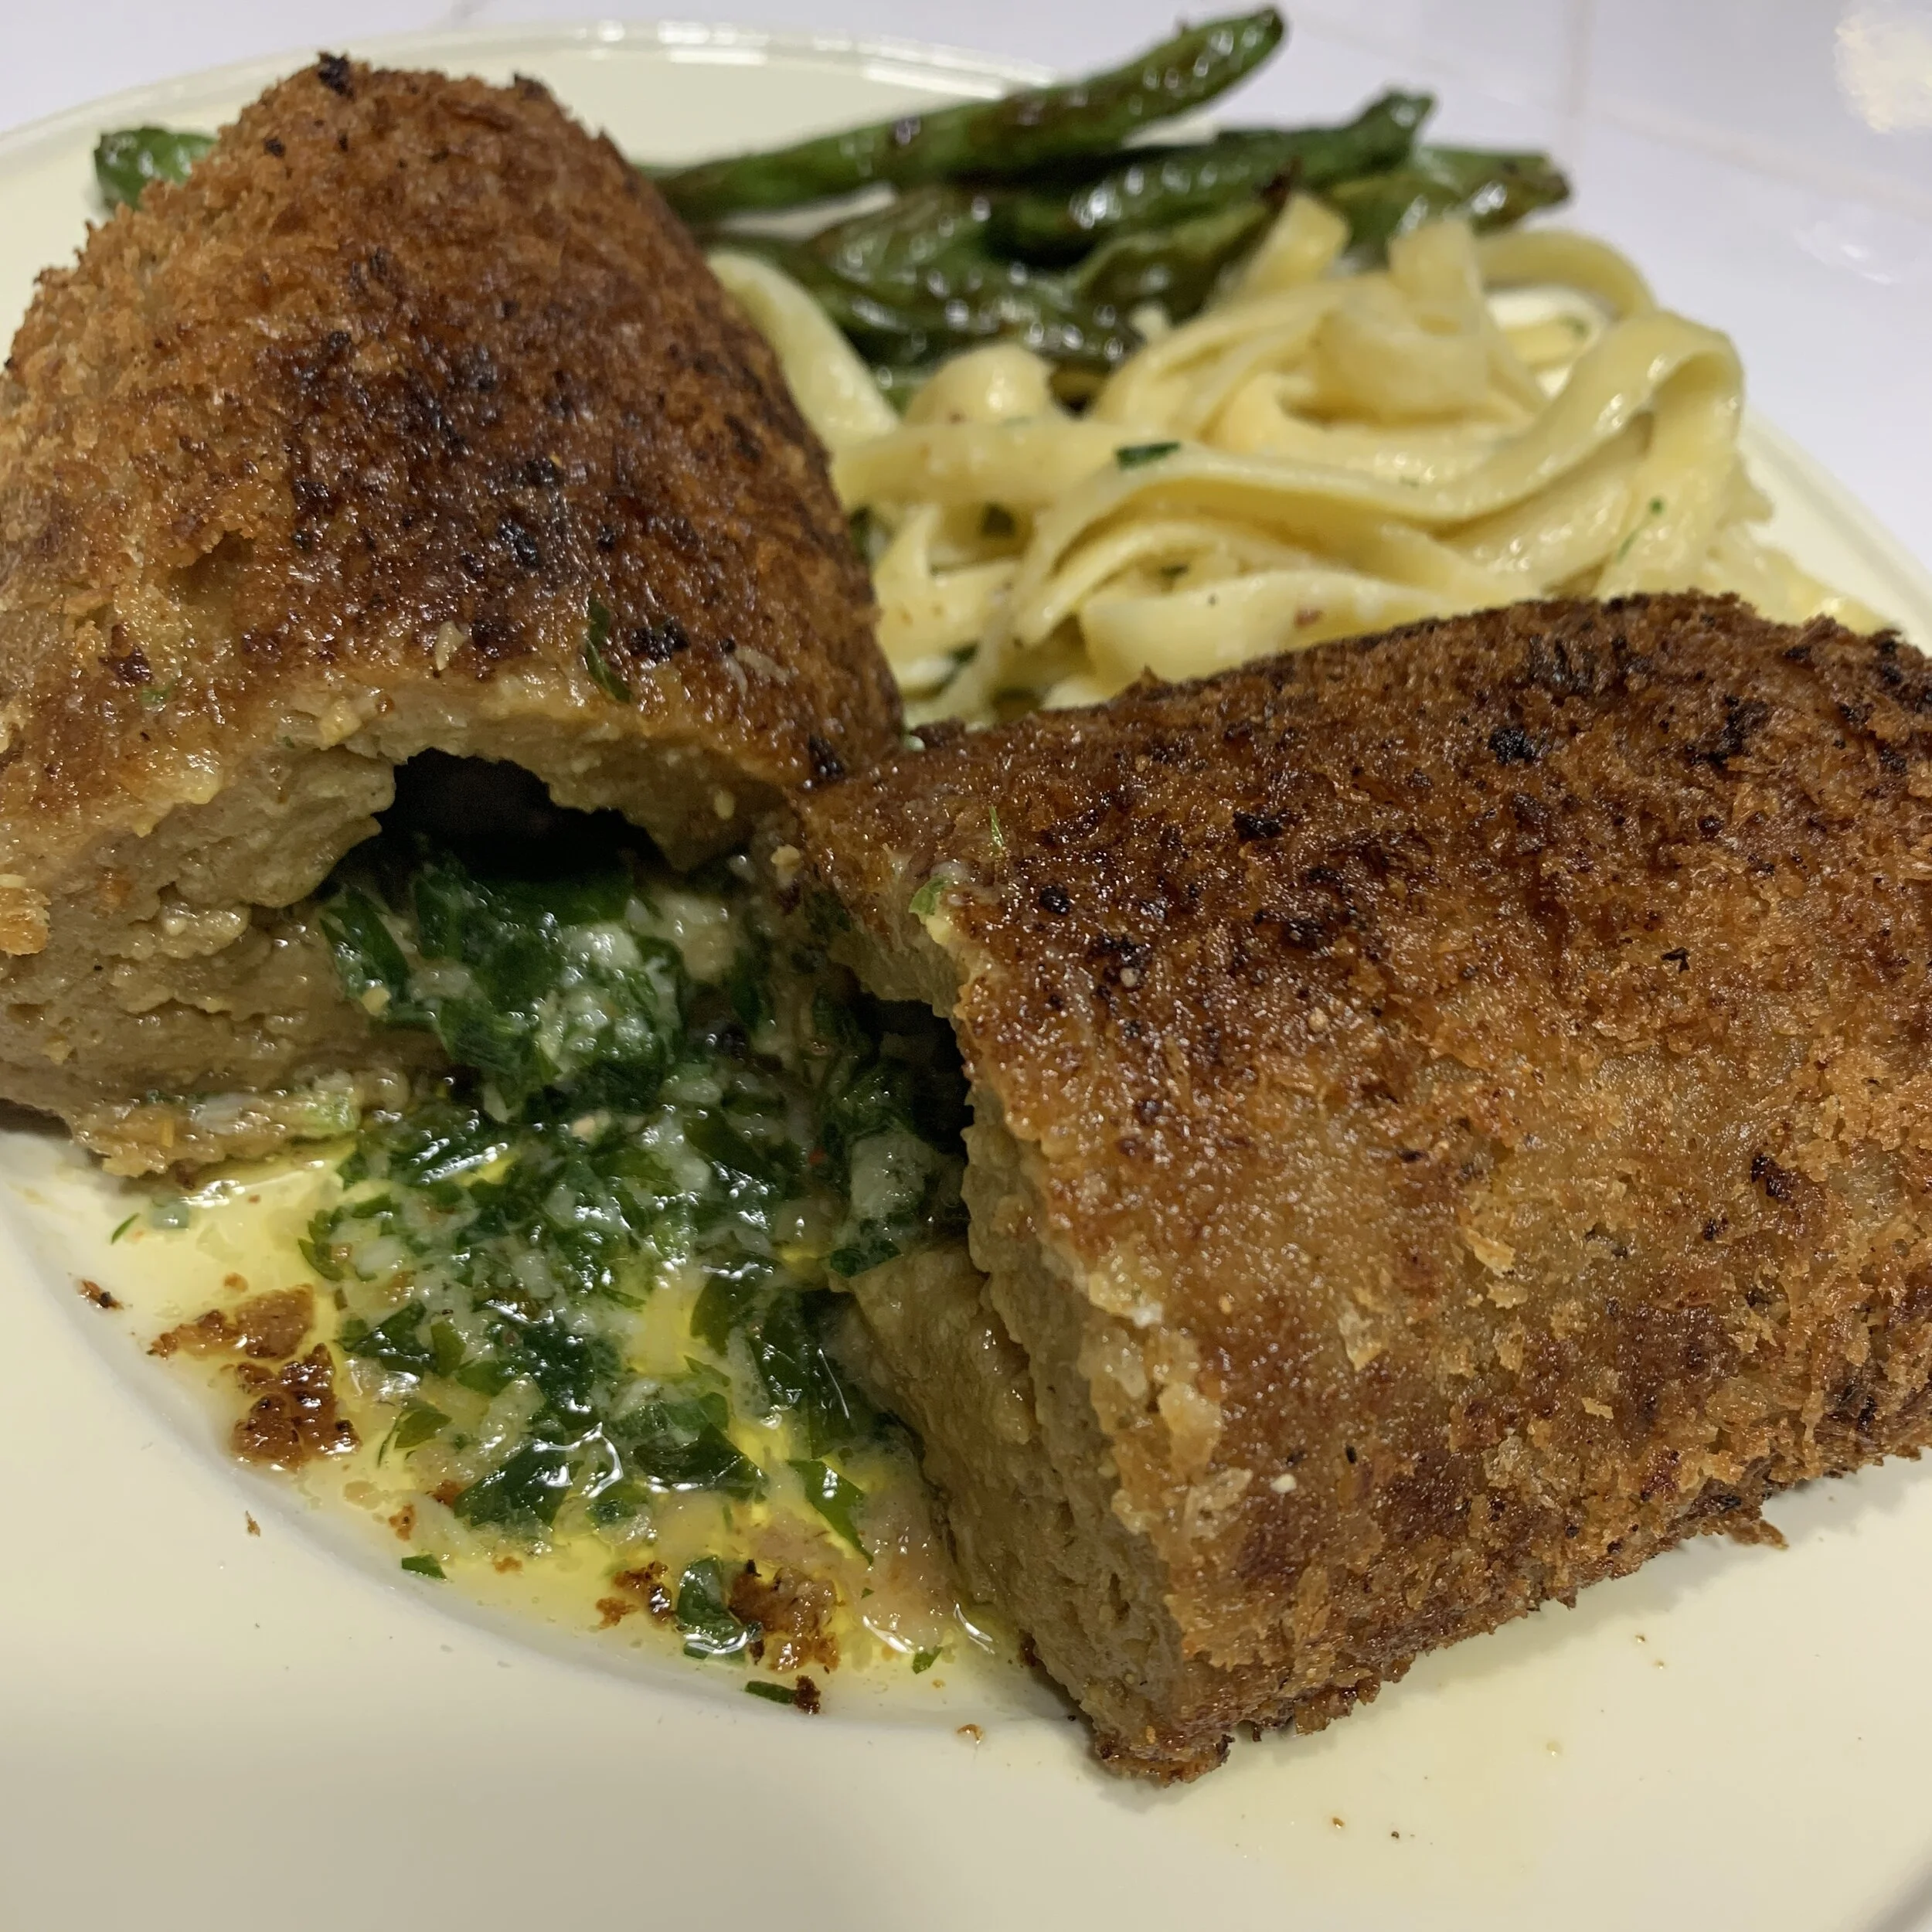
Serve with pasta, green beats or potatoes or some shit.

Now let the butter flow from within.