Swedish Not-Meatballs

Swedish meatballs were invented by IKEA to sell furniture. Can you tell if the word köttbullar means “meatball” or “four piece dining room set?”

As always, if you dig this recipe, tag me at @draggedthroughthegarden on instagram and we can go to IKEA.

Swedish Not Meatballs. Swedish Meatless Balls didn’t sound as good.

IMG_4224.JPG

SWEDISH NOT MEATBALLS

prep time: 20 minutes
cook time: 70 minutes

Also, lay those vegan orbs on top of some garlic butter rotini and you are all set. I’ll fit those directions in here too though the three ingredients are literally in the name.

This recipe will be broken up into three parts: the meatballs, the gravy and the pasta. Amen.

For parts one and two………

What you’ll need:

  • white onion

  • garlic

  • ground plant based meat stuff

  • vegan butter

  • olive oil

  • soy milk

  • white bread

  • salt

  • pepper

  • brown sugar

  • allspice

  • dried basil

  • flax seed

  • nutmeg

  • oat flour

  • vegetable broth

First, dice up a white onion and a whole bulb of garlic. Some of the garlic is going to end up in the pasta later so just get it ready now. These two things will make up two thirds of your mince components.

If your plant based ground meat stuff needs to be defrosted, make sure that it is defrosted.

I didn’t cut the garlic down yet, leave me alone.

I didn’t cut the garlic down yet, leave me alone.

In a pan, heat up some olive oil and throw your MINCED garlic and white onion in there. You want to caramelize both of these things without burning them. Add some salt and pepper into the pan. Once they are done cooking, set them aside for now.

Meatless Farms ground plant stuff. Use whatever brand you like best.

Meatless Farms ground plant stuff. Use whatever brand you like best.

Take two slices of white bread and soak them in soy milk. Almond milk works fine too. Eventually, this too will get added to your mince. Okay I guess that’s more than three components.

You can take off the crusts if you want. I don’t mind them.

You can take off the crusts if you want. I don’t mind them.

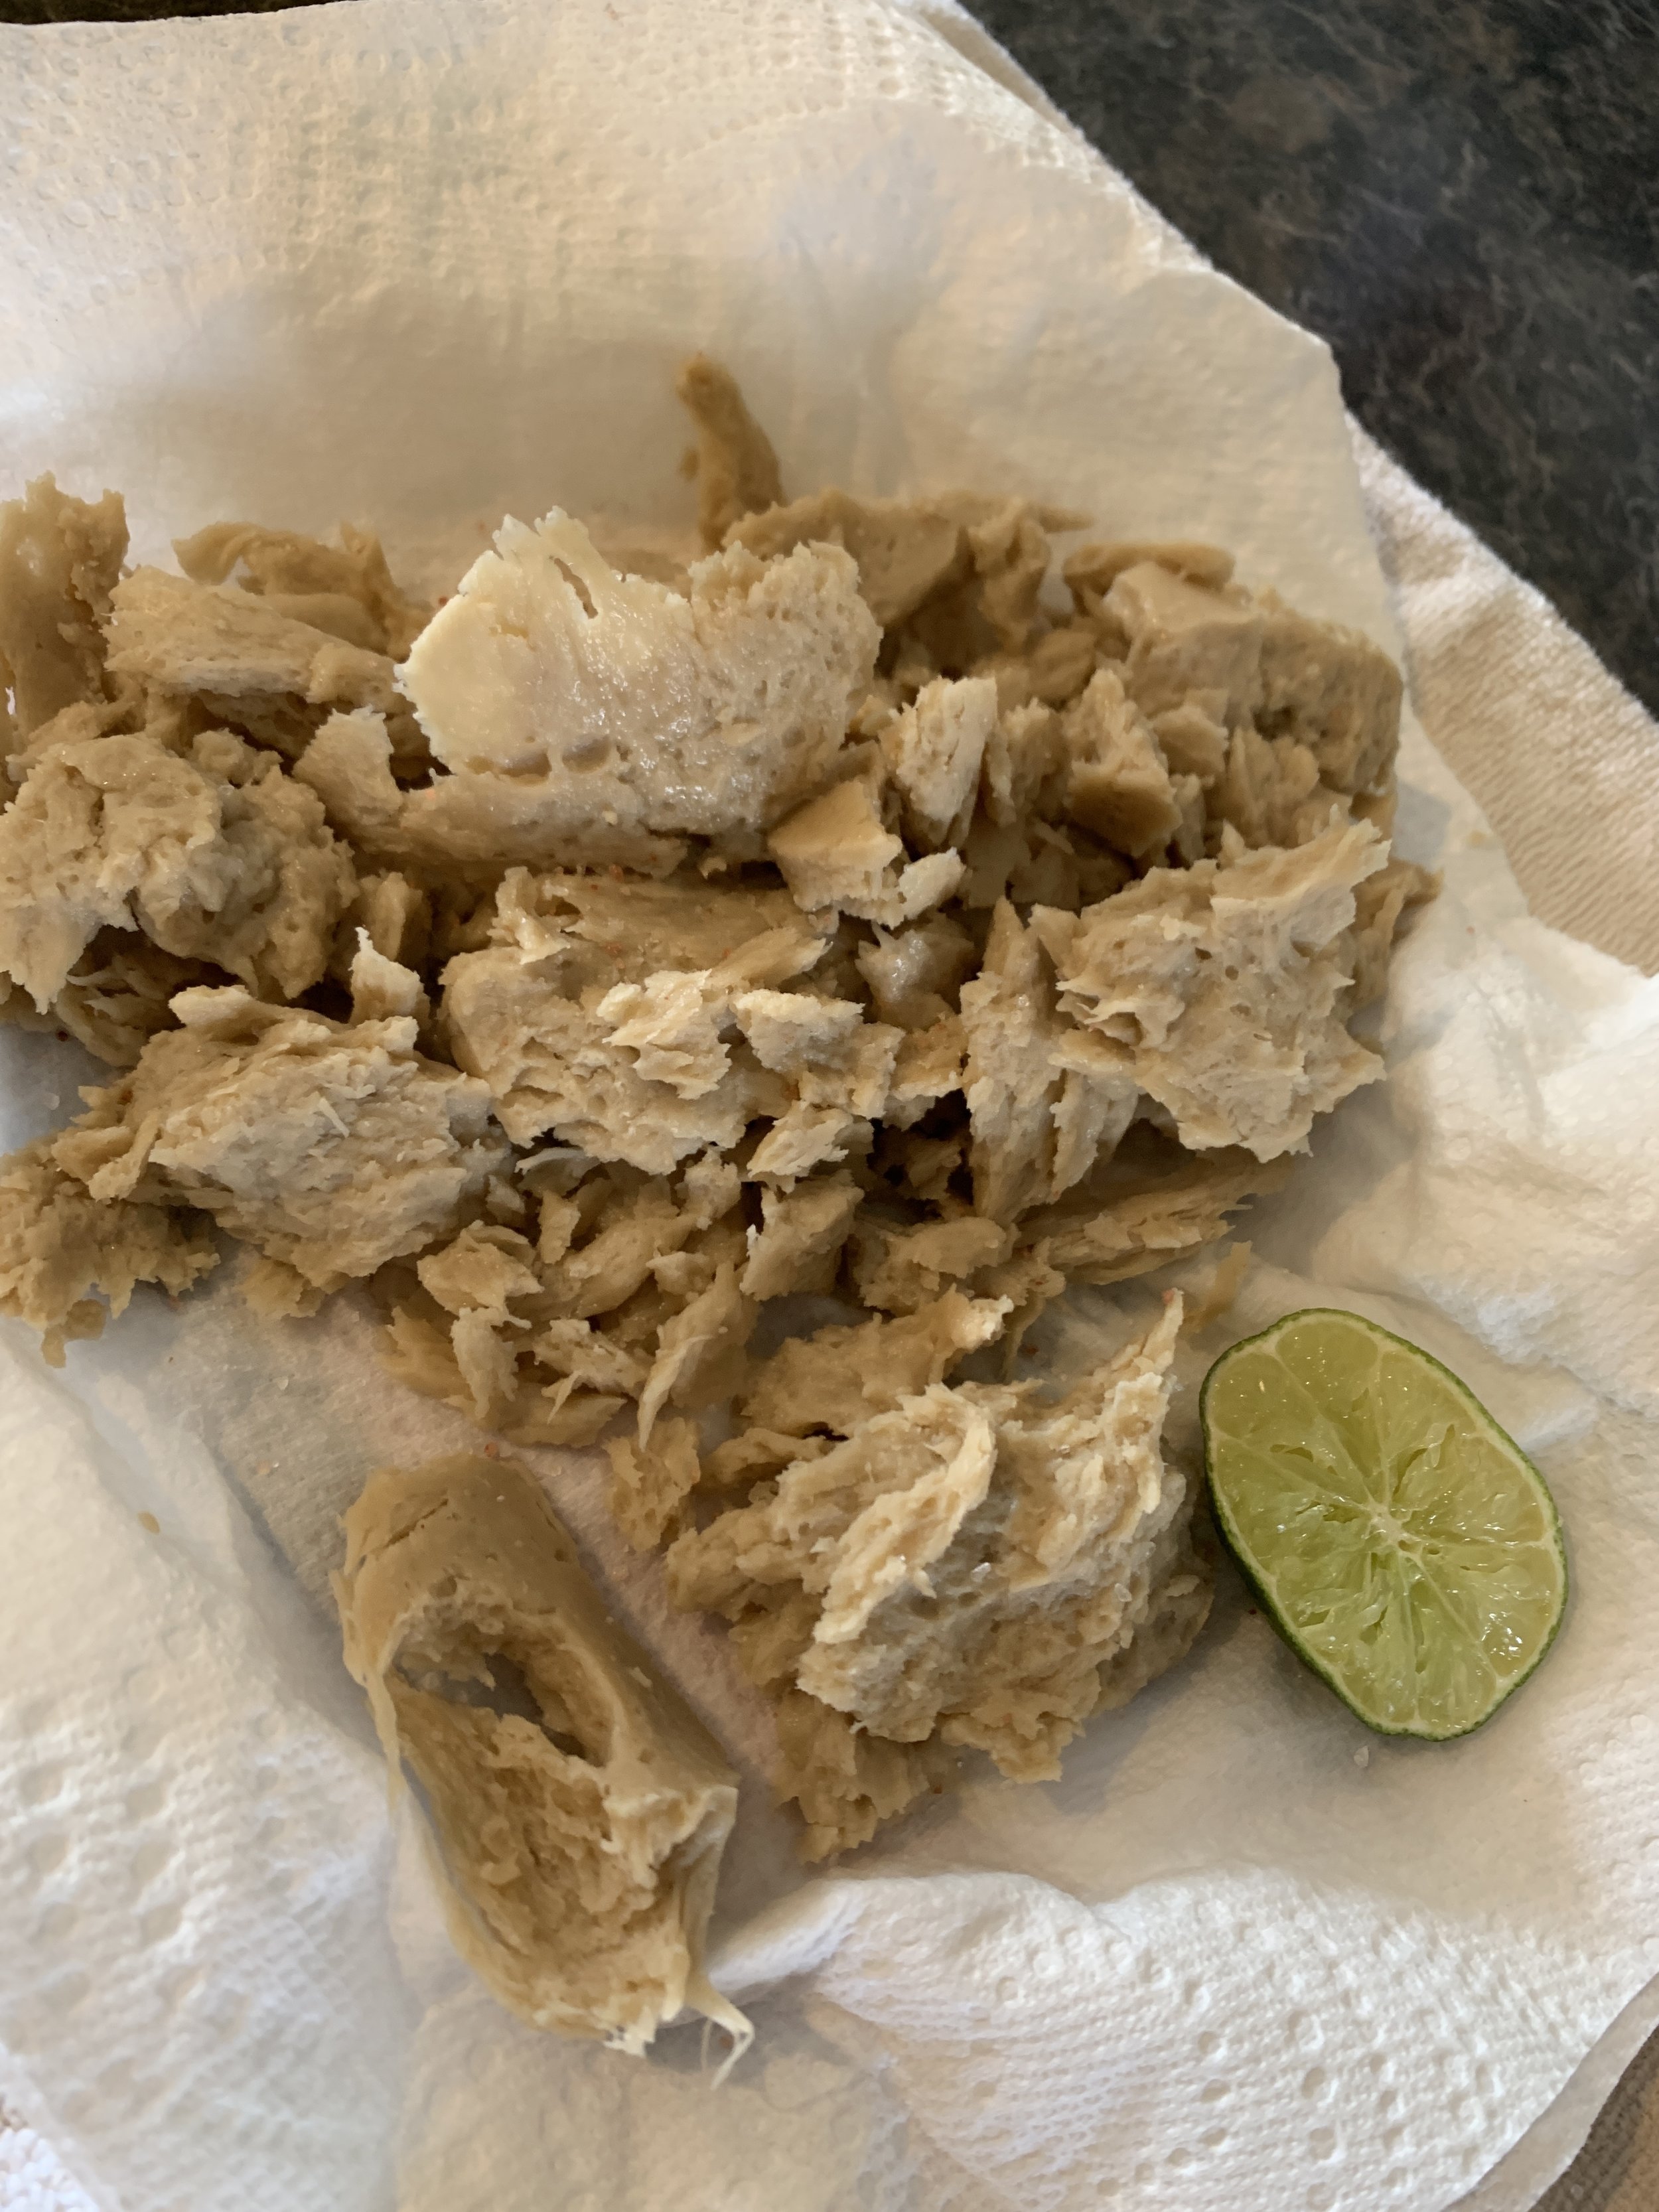
Now take your plant based ground meat stuff and add it to a bowl. If you have gloves, put gloves on. Ground the meat stuff down as much as possible. Take your onions and garlic and add them right into the mince. Please don’t burn your hands.

Mix!

Mix!

After you mix up your mince, remove your soggy bread from the soy milk and squeeze out the excess liquid and then mix that in there too. Again, you can leave the crust or remove it. Up to you.

In a small container, mix a flax seed with water. Two parts flax to water. Mix that up until it has an egg-like consistency. That will go in your mince too.

I didn’t say it was gonna look like eggs.

I didn’t say it was gonna look like eggs.

Add a heaping couple of spoonfuls of brown sugar to the mince as well as salt, pepper, nutmeg and allspice. Go heavy on the allspice.

Is Brown Sugar your favorite D’angelo album?

Is Brown Sugar your favorite D’angelo album?

Now go ahead and mix up all that stuff if you haven’t already. Preheat your oven to 380°. First you’re going to sear the meatballs and then you will bake them through.

Next, you’re gonna roll up some meatballs. Lay out some parchment paper on a baking sheet. Roll up as many meatballs as you can from your mince. You can use a scoop if you’d like but I didn't mind leaving it out. Heat up some oil in a pan on a medium flame.

Vegan orbs!

Vegan orbs!

Doing a few at a time, place the meatballs in the oil to sear for a few minutes on each side. Make sure you don’t move them around in the pan otherwise you will lose your crust. Sear them as evenly as possible and then put right back onto the parchment paper. Continue doing this until they are all seared.

Vegan orbs swimming in radioactive fluid!

Vegan orbs swimming in radioactive fluid!

Now that all of your meatballs are seared, stick the whole baking sheet in the oven. Bake them for 30 minutes and check on them. If they need more time, put them back in for an extra 10-15 minutes.

Next, while your meatballs are baking, you can make your gravy. Using the same pan you just used, on a medium flame, add vegetable broth and brown sugar. Salt and pepper to taste. Bring the flame up a little bit and sieve some oat flour into the pan. Whisk like crazy until it thickens into a gravy like consistency. Drop the flame and let it simmer.

All aboard the gravy train!

All aboard the gravy train!

AND THEN as your meatballs are cooking, you can make your pasta. I used rotini for this recipe but you can use whatever you want. Cook your pasta according to the directions and be sure to salt your pasta water. Using some of your minced garlic from earlier, mix that up with some vegan butter in a separate dish and melt it down in a pan. I blended mine at the end to ensure maximum smoothness. You can too if you’d like.

Once your pasta is cooked, drain the water (except a little bit because keeping a little pasta water is important.) Put the pasta back in the pot and add olive oil and stir so it doesn’t stick to the pot. Add your garlic butter.

Garlic butter! Preblended!

Garlic butter! Preblended!

I added extra butter too. They’re buttered noodles damn it!

I added extra butter too. They’re buttered noodles damn it!

Now that your pasta is complete and your gravy is ready, check the status of your meatballs if they are still cooking. If they’re ready too, plate some of your pasta. Add some of your meatballs on top and throw some gravy on there. It’s the holidays, we aren’t counting calories until 2020.

IMG_4226.JPG

Vegan Chicken Parm

One day I was listening to Wait Wait Don’t Tell Me, and they said apparently chicken parmesan is some kind of millennial aphrodisiac. Well this version is way sexier because it is meatless and dairy free.

As always, if you dig this recipe, tag me at @draggedthroughthegarden on instagram and we can talk about Wait Wait Don’t Tell Me.

Vegan Chicken Parmesan. Also known as Vegan Chicky Chicky Parm Parm.

IMG_4255.JPG

VEGAN CHICKEN PARMESAN

prep time: 20 minutes
cook time: 65 minutes

There aren’t as many pictures in this one but I’ll do my best to walk you through it. Serve this with spaghetti noodles…or don’t. But it’s better if you do.

This dish is relatively easy to make. The most time consuming aspect is constructing your sauce, but once you sauce is cooking, you can…..do other stuff.

What you’ll need:

  • white onion

  • garlic

  • vegan butter

  • olive oil

  • fresh basil

  • canned tomatoes

  • baby bella mushrooms

  • vegan parm

  • vegan mozz

  • gardein cutlets (two bags)

  • salt

  • pepper

  • red pepper flakes

  • oregano

  • dried basil

  • spaghetti

First, dice up a white onion and a whole bulb of garlic. Then heat up some olive oil in a big pot. Dice up a bunch of mushrooms too. Heat up a small pot with salted water and cook your spaghetti in there. Follow the directions on the package. Once your spaghetti is cooked, add olive oil and vegan butter. And then sprinkle some dried basil on there. NOW BACK TO THE PARM.

Like this. The mushrooms were chopped previously and bagged off.

Like this. The mushrooms were chopped previously and bagged off.

Add your onion into the pot after your olive oil is of temperature. Let them brown and be sure not to burn them. After you see some color in the onions, add your garlic into the pot and stir them thangs up. Then once they get some color too, add your mushrooms in and keep stirring. Add salt and pepper to the pot.

Open your can of tomatoes, and add the entire can into the pot. Be sure to pull out any greenery that comes in the can, don’t add it to the pot. Stir the tomatoes and sauce thoroughly and bring your temperature up. Using a wooden spoon or something, start to crush the tomatoes as they cook so they blend more evenly into the sauce.

Here’s what it looks like only adding some of the tomatoes so you can see the base layer.

Here’s what it looks like only adding some of the tomatoes so you can see the base layer.

Add a generous amount of oregano and red pepper flakes into the pot. Dice up some fresh basil and add that directly into the sauce. All of these components will add fragrance and depth to your sauce. Once your sauce is bubbling from the temperature, put a lid on it and drop the flame to medium-low to simmer.

Next, while your sauce simmers, you can get your vegan chicken things ready and grate down some parm.

I used a brick of violife parm. Grate down lots of it.

I used a brick of violife parm. Grate down lots of it.

As for your cutlets, I highly suggest these. They say turk’y but we making chick’y.

As for your cutlets, I highly suggest these. They say turk’y but we making chick’y.

The directions on the Gardein cutlets say to bake them, but for this recipe you will be searing them in the pan.

Heat up some oil in a non-stick pan and add your cutlets. I was able to fit four in the pan at once. Do however many you feel comfortable keeping an eye on. Sear the cutlets on both sides and season with salt and pepper. The cutlets are going to get baked directly in the sauce later so the important part is that they are moderately crispy on each side.

Now that you have a bunch of cooked cutlets, you’re going to bring everything together in a cast iron skillet.

Next, add some oil into your cast iron and spread it out evenly so there aren’t any globs of oil in your skillet. Add your cutlets into the skillet and throw some of the grated parm on each one of them.

Hell yeah, cutlets!

Hell yeah, cutlets!

Now you’re going to transfer your sauce directly into the cast iron providing a delicious swimming pool of red sauce for your cutlets to swim in. Be sure to get some sauce underneath the cutlets as well. Preheat your oven to 400°. This part I don’t have pictures for so bear with me. Now you have a big skillet full of red sauce. Around the perimeter of the skillet, add like six knobs of vegan butter that will seep down the sides of the skillet while baking.

Put the whole skillet in the oven and cook uncovered for twenty minutes. After those twenty minutes, carefully pull the skillet out without burning yourself and stir the contents. Add pretty much an entire bag of vegan mozz on top of the contents of your skillet. Spread it as evenly as possible.

Throw the skillet back in the oven for twenty more minutes. Pull it out and stir it up again. This time add lots of grated vegan parm from earlier into the skillet. Put the skillet back in the oven for fifteen more minutes or more if it looks like it could use more time.

Starting to look better but still not done.

Starting to look better but still not done.

Keep an eye on your skillet and keep cooking if need be. At the end of baking it, switch your oven to a high broil setting and leave it in the oven for about three minutes. Just keep an eye on it so you don’t burn the shit out of everything. Remove the skillet carefully and let it cool down. After your broil, you should have a nice crust on top of your chicky parm. Add a little more of the grated parm on top of everything and fill your tummy with vegan chicken parm greatness.

You did it!

You did it!

Serve on a festive paper plate. Or just a regular plate.

Serve on a festive paper plate. Or just a regular plate.


Penne Alla Vodka

This recipe has vodka in it so it’s technically a cocktail. And it’s pasta. A combination of two incredible things!

As always, if you dig this recipe, tag me at @draggedthroughthegarden on instagram and we can talk about pasta.

Penne Alla Vodka. Stirred, not shaken.

IMG_4007.JPG

PENNE ALLA VODKA

prep time: 15 minutes
cook time: 30 minutes

No cashews required.

To reiterate, this dish is pretty easy to make and most of the time that goes into it is simmer time. So you can clean up whatever mess you make. This recipe will be split into two halves. The soup itself, and the bread that accompanies.

What you’ll need:

  • sweet onion

  • garlic

  • vegan butter

  • olive oil

  • penne

  • canned tomatoes

  • vodka (or vinegar)

  • soy milk

  • oat flour

  • salt

  • pepper

  • cayenne pepper

  • dried basil

  • fresh basil

  • mozz/parm (for topping)

First, dice up half of a white onion and a whole bulb of garlic. You can use less garlic if you want, but the more the better. Heat up some olive oil in a pan and toss in your onion and garlic. Add salt, pepper and cayenne and let them cook for a few. Stir frequently to prevent burning. Add half a cup of vodka into the pan and let the alcohol cook out for a few minutes. If you don’t wanna use vodka, you can use some kind of vinegar as a substitute.

You don’t have to dice them super fine, because they will end up in the blender. The vodka will take only about two minutes to cook out.

You don’t have to dice them super fine, because they will end up in the blender. The vodka will take only about two minutes to cook out.

Next open your can of tomatoes, and add three cups right into the pan. Splash a little extra olive oil in there too. Stir up the whole mess so your tomatoes cook out.

You could just stop the recipe here and enjoy a deconstructed Bloody Mary!

You could just stop the recipe here and enjoy a deconstructed Bloody Mary!

Add some dried basil and continue to stir. Once your mixture looks….mixed, throw all of the contents of your pan into a blender. Throw a few leaves of fresh basil in there too.

Dare you take a sip.

Dare you take a sip.

Pulse the contents of your blender until it reaches the desired consistency you want. I went extra smooth but having some texture in there won’t hurt.

Leave your newly blended red soup in the container for now.

Next, you can cook your pasta. Follow the directions on your penne and don’t forget to salt your water when you boil it. Once they are cooked, drain the pasta but leave some of the water in the pot and put your penne back in there. Add a generous splash of olive oil to prevent the pasta from sticking to the pot.

Truly, a penne for your thoughts.

Truly, a penne for your thoughts.

Next, you’re going to make a roux and the second part of your sauce. This will act as the heavy cream/cashew/whatever substitute and bring some real thiccness to your sauce. If you don’t want the sauce super thicc, cut the amounts in half. Personally, I made it quite thicc. THICC.

After your pan is cooled off, give it a good wipe and get all the tomato junk out of there. Once it’s clean, add a big ol’ knob of vegan butter in there along with a splash of olive oil. Using a sieve, add an equal amount of oat flour right into the pan and STIR! STIR! STIR! To reiterate for the thousandth time, always sieve your flour to prevent clumping.

Look at that SIEVE!

Look at that SIEVE!

It should look like this!

It should look like this!

Once your roux looks like that, heat up a cup of soy milk in the microwave for like 30 seconds. Almond or oat will work fine, coconut will be too sweet. Once it’s warm, add it little by little into the pan and keep stirring. You warm the soy milk up some so your mixture doesn't just harden up right off the bat.

Now it should look like this!

Now it should look like this!

Now, go find the blender contents of tomato juice you made earlier and whisk that right into your pan as well. Do this on a medium-low flame and gradually bring the temperature up.

Guess what, it looks like this now!

Guess what, it looks like this now!

Now take your penne and add it directly into the sauce and stir til everything is coated evenly.

Not coated evenly!

Not coated evenly!

Simmer the pasta in the sauce for a little bit and chop down from of that fresh basil. If you have mozz/parm on hand, grate that and use them both for topping. You can use parsley too if you’d like.

Now you can eat your pasta and pair it with bread because you know what goes well with carbs? More carbs.

You did it!

You did it!


French Onion Soup

I continue to be a major advocate for soup because one, it’s soup and who doesn’t like soup? Two, it’s very passive to make and you can clean as you go.

As always, if you dig this recipe, tag me at @draggedthroughthegarden on instagram and we can talk about bread.

French Onion Soup. Or as they call it in France, “Onion Soup.”

IMG_3631.JPG

FRENCH ONION SOUP

prep time: 15 minutes
cook time: 35 minutes

But for real, do they just call it “onion soup?”

To reiterate, this dish is pretty easy to make and most of the time that goes into it is simmer time. So you can clean up whatever mess you make. This recipe will be split into two halves. The soup itself, and the bread that accompanies.

What you’ll need:

  • sweet onion

  • garlic

  • vegan butter

  • olive oil

  • vegan mozz

  • vegetable broth

  • red vermouth (or red wine…or balsamic vinegar)

  • bouillon (optional)

  • salt

  • pepper

  • thyme

  • bay leaf

  • oat flour

  • molasses (optional)

First, dice up a white onion. The whole thing. Try not to cry. After that, peel a bulb of garlic and chop that up too. Get out a big pot and add enough olive oil to coat the bottom.

You vs. the guy she tells you not to worry about. Just kidding, she loves you.

You vs. the guy she tells you not to worry about. Just kidding, she loves you.

Once your oil is hot, add all of your onion into the pot. Be sure to stir frequently so your onions don’t burn. Add a big chunk of vegan butter into the pot and let it cook together for a few. Once everything starts to brown, add your garlic into the pot. Stir that up so the garlic cooks and your onion doesn’t burn. Drop the flame a little bit now.

I wish you could smell this picture.

I wish you could smell this picture.

Once your garlic/onion/oil/butter mixture is nice and cooked, add a generous splash of red vermouth. You can use red wine if you have a bottle open or balsamic vinegar if you don’t have either of the aforementioned. Have your oat flour ready,.

Don’t use the cheap stuff either, churn out the extra few bucks and get a nice bottle.

Don’t use the cheap stuff either, churn out the extra few bucks and get a nice bottle.

Let your vermouth/wine/balsamic cook out for a minute and then sieve a few tablespoons of oat flour directly into the pot. This will thiccen that boy up and leave your soup with some texture after you add your broth.

Sieve! Sieve! Sieve! Clumps are bad!

Sieve! Sieve! Sieve! Clumps are bad!

Once your flour is added, you should have a nice gravy-esque thing going on in your pot. Add salt, pepper and thyme into the pot.

I suppose somehow this could double as a gravy recipe. Writing that down for later.

I suppose somehow this could double as a gravy recipe. Writing that down for later.

Next, you are going to add your broth into the pot and turn that gravy into soup. If you have 32oz containers, use two of them. 64 oz of broth will go into this thing. Bring your temperature up so you can bring the broth to a boil. Add more salt, pepper and a couple tablespoons of nutritional yeast.

Into the pot you go!

Into the pot you go!

In a separate dish, add a knob of butter, some olive oil and a generous clump of vegan mozz. Put that into the microwave for 30 seconds to soften it up. You can then add this mixture right into the soup to ensure it mixes smoothly.

Melty stuff ready to be added to the pot.

Melty stuff ready to be added to the pot.

Add that mixture into the pot and then toss a bay leaf in there and a cube of bouillon. Add a little molasses too if you have some. Give it a good stir and when it starts to boil, put a lid on it and drop the temperature so that thing can simmer out.

While your soup is simmering, preheat your oven to 350°. The second half of this recipe will be the bread and soup toppings.

What you’ll need:

  • french bread

  • olive oil

  • vegan mozz

  • salt

  • parsley (or green onion)

Cut your bread into slices and get out a baking sheet. Add some oil to the sheet and lay your slices on there. Add some oil to the top of the bread slices and then add a big clump of vegan mozz onto each one. Add a little bit more olive oil and salt onto each one.

Tip: Using an olive oil spray for this part works wondrously.

Like so.

Like so.

Put your bread in the oven for 15 minutes. While your bread cooks, sample the soup and see if it needs any extra loving. Once the fifteen minutes is up, switch the oven over to broil for a couple of minutes. Keep a very close eye on the bread once your oven is broiling to ensure you don’t burn anything.

It should look something like this.

It should look something like this.

Pop your bread out of the oven without burning yourself and let them cool down.

Chop down a little bit of parsley or green onion to garnish your soup with. Make sure to wash your parsley if necessary.

Lastly, put your soup into a bowl, throw some of your cheesy bread in there along with a few leaves of parsley. Or green onion. Don’t eat the bay leaf.

Bon appetit, motherfucker.

Bon appetit, motherfucker.


Vegan Popeyes Sandwich

Don’t like waiting in lines? Don’t eat meat? Perfect. If Popeye gets a reboot in 2020, he’ll be eating these instead of spinach.

As always, if you dig this recipe, tag me at @draggedthroughthegarden on instagram and we can debate over which streaming service will get the rights to the Popeye cartoons.

The Plant Based Popeye Sandwich. Popeye didn’t get swoll eating meat.

IMG_3551.JPG

PLANT BASED POPEYE

prep time: 20 minutes
cook time: 20 minutes

I’ve used the word vegan a whole bunch, plant based rolls off the tongue easier here.

All in all, this is a pretty quick sandwich to put together. The “chicken” is made of oyster mushrooms. Pickles and chipotle mayo on a toasted bun with butter. There isn’t even spinach on this thing. Poser.

What you’ll need:

  • oyster mushrooms

  • oat flour

  • soy milk (unsweetened almond is fine)

  • apple cider vinegar

  • salt

  • pepper

  • onion powder

  • garlic powder

  • adobo

  • cayenne pepper

  • olive oil

First, you’re going to get your flour started. Sieve oat flour into one bowl. Always sieve to prevent clumping. In another bowl, add soy milk and a generous splash of apple cider vinegar. Whisk up that one and let it sit for a second until it starts to curdle some. This will function as your buttermilk. Take a pinch of the flour and put it into your buttermilk. Stir.

Two bowls, one for the plug and one for the load.

Two bowls, one for the plug and one for the load.

Take a couple teaspoons each of salt, pepper, adobo, cayenne, onion powder, and garlic powder and add it directly to your mushrooms as well as your flour. You want all of these flavors to carry through your batter.

Look, here they are!

Look, here they are!

In a small pot, heat up some oil and add a little salt.

Take your oyster mushrooms and remove obnoxious stems as needed. They are very chewy and not the texture you’re going to want on a sandwich. Coat them one by one in dry flour, then into the buttermilk and then back into the dry flour. Set them on a plate for now while your oil heats up.

Once you have the mushrooms all coated, add one into the pot to fry. It’s easier to do these one by one and in a pot rather than a pan to minimize mess and oil usage. Fry them on each side, until they are golden brown and then set aside.

Mind the dirty stove, had a little oil fly out of there.

Mind the dirty stove, had a little oil fly out of there.

Once you’ve gotten through each of your mushrooms, sprinkle a little bit of cayenne pepper and black pepper right on top of them.

Some of those stems will get chopped off.

Some of those stems will get chopped off.

Next, you are going to prepare your chipotle mayo. There are a few ways to approach this, so it’s however you want to do it. If you want to mix mayo with chipotle hot sauce, that works. If you wanna boil down some chiles and stuff and mix it with mayo, that works too. If you want to make mayo yourself out of cashews and the aforementioned, that might take a while but you can do that too. I chose option two because I had chiles, garlic and onion on hand. No cashews though.

If you do it this method (recommended) — here is….

What you’ll need:

  • garlic

  • onion

  • apple cider vinegar

  • salt

  • dried ancho chiles

  • olive oil

Peel some garlic, dice up a little onion and remove the stem from your ancho chile. Take the seeds out of the pepper so you don’t burn your mouth off.

This is really about all you’ll need.

This is really about all you’ll need.

In a new pot, add olive oil and bring the heat up. Add your onion, garlic and ancho into the oil and let everything cook and blister for a minute. Add a splash of apple cider vinegar. Once everything looks browned, add a big splash of water and bring the contents to a boil. This will soften everything and ensure a smooth blending.

Here is a somewhat blurry picture of those things.

Here is a somewhat blurry picture of those things.

Drop the flame and add the contents to a blender. Pulse until smooth and then let cool down. This will eventually get mixed with your store bought mayo because cashew mayo takes too much time.

That color will get toned down once you add mayo, but still looks pretty cool.

That color will get toned down once you add mayo, but still looks pretty cool.

Make a mixture of one part chipotle to two parts mayo. Or half and half, whatever.

See?

See?

Next, your sandwich is almost done — all you have to do is toast your buns and get pickles out of your fridge.

What you’ll need:

  • hamburger buns

  • butter

  • sandwich pickles

You can use the same pot you made your chipotle sauce in. Assuming it’s dry, add a knob of butter into the pot and throw your bun in there. My pot only allowed me to do one at a time. Coat the buns as evenly as you can and be sure the inside halves get nice and crispy.

Once your buns are ready to do, add your chipotle mayo to each bun, put a few pickles on there and add your fried oyster mushrooms. I hope you aren’t counting calories. Agagagagagagaga.

I will gladly pay you tomorrow for a sandwich today!

I will gladly pay you tomorrow for a sandwich today!


Teriyaki Tofu Fried Rice

Fried rice. It’s simple to make and it’s a good way to clean some stuff out of your fridge. Also it’s very colorful and aesthetically pleasing. That’s all I got.

As always, if you dig this recipe, tag me at @draggedthroughthegarden on instagram and we can talk about how ribboning your carrots is cooler than just cutting them up.

Teriyaki Tofu Fried Rice. Look at all the colors!

IMG_3204.JPG

TERIYAKI TOFU FRIED RICE

prep time: 15 minutes
cook time: 25 minutes

I didn’t have peas so peas forgive me.

Gonna lay out what you’ll need for this recipe. You can interchange things as you peas. The teriyaki sauce stuff will be separate.

What you’ll need:

  • rice (I used basmati)

  • extra firm tofu

  • olive oil

  • salt

  • pepper

  • garlic

  • onion

  • carrot

  • broccoli

  • red cabbage

  • peas (I guess)

  • green onion

  • toasted sesame seeds

  • sriracha

First, you’re going to press your tofu. This part is always important so it doesn’t get soggy and gross when it cooks. Wrap it up in some paper towels and place something heavy on top of it.

While the tofu is being pressed, you can get your rice going and start to dice up your vegetables.

Bring a small pot of water to a boil. Add salt to the water. Always do one part rice to two parts water. Periodically test the rice to make sure it cooks properly. Stir just as periodically.

Peel and chop up some garlic. The more the better. Then some red onion. Chop up some broccoli. If you bought florets, just trim them down a little so you don’t get a mouth full of broccoli later. Chop up some red cabbage. Next, peel a carrot. One large one should be enough. After your carrot is peeled, you’re going to keep peeling it. Ribboned carrots look way cooler in the dish.

Wow look how ribbony those carrots look.

Wow look how ribbony those carrots look.

Your rice is probably good to go, so toss it in a strainer and then back in the pot. Add a little olive oil to it so it doesn't stick to the pot. Add salt, pepper and red pepper flakes right into the rice.

Next, you’re going to get your tofu and your teriyaki sauce ready. Cut the tofu down into nice, little cubes. Set them aside for a moment. Teriyaki ingredients are as follows.

What you’ll need:

  • coconut aminos

  • peanut butter

  • brown sugar

  • sriracha paste

  • turmeric

  • garlic powder

  • miso paste

  • store bought teriyaki sauce (we’re doubling down)

Into a small container, add a generous amount of coconut aminos and one part teriyaki sauce. I used the soyaki stuff from Trader Joe’s. I just wanted more sauce, you feel me. Add sriracha paste, turmeric, garlic powder and peanut butter into the container.

The peanut butter is going to be hard to break down by stirring and there’s no sense in getting the blender dirty. Throw your mixture in the microwave for 45 seconds and it will help break down the peanut butter and make it easier to stir.

Add a teaspoon or so of miso paste and then a teaspoon of brown sugar into the mixture and stir the rest up.

Spices and brown sugar not pictured.

Spices and brown sugar not pictured.

Now that your teriyaki sauce is ready to go, you’re gonna cook your tofu. Oil a pan/wok and heat it up to a medium flame. Add your tofu and then add salt, pepper and red pepper flakes. Let each side cook out thoroughly and then you’re going to bring the heat up to high and really sear each side. You want your tofu to be extra crispy because you’re going to douse it in teriyaki sauce shortly.

Premature tofus.

Premature tofus.

Postmature tofus!

Postmature tofus!

Once your tofu is cooked, set them aside into a bowl to rest for a minute. Bring the flame down back to medium on your pan and let it get to temperature. Take your teriyaki sauce and pour it directly over your tofu and toss it around. Don’t use all your teriyaki because more will go into the pan soon.

Now that your pan is at a lower temp, add your onion and garlic with a little bit of olive oil. Sesame oil works too. Once they start to brown, add your broccoli and your cabbage. Now add your tofu and give it all a good stirring.

So vibrant and full of texture!

So vibrant and full of texture!

Now you can add your rice right in there too. You probably won’t have to use all of the rice you made, I overshot it a little bit.

Keep stirring and add more of your teriyaki sauce right into the pan to get all the rice covered. Add your carrots in there too now.

Keep stirring and add more of your teriyaki sauce right into the pan to get all the rice covered. Add your carrots in there too now.

Ribbons! You could add peas now too if you peas.

Ribbons! You could add peas now too if you peas.

Lastly, you can bring the heat up some and let everything cook out a little more. Stir frequently so your rice doesn’t get clumpy. After everything looks correct, kill the flame and get your garnishes ready. Dice up some green onion and dig the sriracha out of your fridge. If you have toasted sesame seeds, grab those too.

Put your fried rice mixture into a bowl, top with green onion, sesame seeds and sriracha.

Everything pairs with Topo Chico.

Everything pairs with Topo Chico.


Vegan Sleep Burger

This next one is more of a “here’s how to make this vegan” as opposed to an actual recipe. You ever see the Kuma’s Corner burger of the month for November? It’s called the SLEEP burger and it is a Thanksgiving feast between two buns. Now you may follow the smoke to the plant based version…land. This is the Kuma’s concept, just veganized. So it’s more of a go-out-and-buy-these-items recipe than an actual recipe.

As always, if you dig this little tribute, tag me at @draggedthroughthegarden on instagram and we can talk about dropping out of life, burger in hand.

The Vegan Sleep Burger. Follow the smoke to the plant-based land.

IMG_2640.JPG

THE VEGAN SLEEP BURGER

prep time: 15 minutes
cook time: 45 minutes

Not only is it a reference to the band, but also what you will be doing shortly after consuming it.

First, I’m gonna just lay out what you’ll need for this recipe. I’ll post pictures below of which versions of each item I used and what you could also use.

What you’ll need:

  • vegan burger/ground

  • vegan stuffed turkey

  • olive oil

  • salt

  • pepper

  • garlic

  • onion

  • thyme/rosemary/sage

  • vegan butter

  • pretzel buns

  • vegan gravy (store bought works just fine)

  • cranberry sauce

You can use Beyond or really any type of plant based burger. These are personally my favorite.

You can use Beyond or really any type of plant based burger. These are personally my favorite.

These work best for the “stuffed turkey” aspect of the recipe. These also come with gravy so that saves you a step!

These work best for the “stuffed turkey” aspect of the recipe. These also come with gravy so that saves you a step!

These 3-pack herb blends work like a charm. Especially because we’re trying to stuff this burger full of Thanksgiving flavors.

These 3-pack herb blends work like a charm. Especially because we’re trying to stuff this burger full of Thanksgiving flavors.

Now for the actual recipe —

Make sure your burgers are defrosted if need be. The ground stuff typically needs to be. So defrost it.

You’re going to start with the stuffed turkey things. Obviously vegan. I’m not gonna type the word vegan over and over.

Preheat your oven to 450°. You’re going to pretty much follow the directions on the package but with a few additions. The recipe on the package says to put the turkey things on a baking sheet, which is totally fine, but I used a small cast iron plate with the addition of butter, garlic and herbs.

While your oven is coming to temperature, peel up a bunch of garlic and chop down some onions. The onions will be for later but you can knock them out now.

Put some olive oil on the cast iron/sheet and coat the turkey things as evenly as possible. Add some vegan butter onto the cast iron/sheet along with some of your herbs and garlic. You really want it to taste like an entire Thanksgiving meal in your mouth.

Sacred Israel Holy Mountain Zion, that looks good!

Sacred Israel Holy Mountain Zion, that looks good!

Pop that whole thing into the oven for about 25 minutes. While this is cooking you can prepare the burger part of the recipe. I’ll have another reminder posted below somewhere that you will have to pop the turkey things out of the oven to flip them and remove the herbs. But here is reminder number one.

Next, you’re going to get your burger ready. Yes you are correct, you will be eating both of these items on one sandwich.

If you’re using a ground plant based burger, throw some of the onion and garlic in there along with a few thyme leaves. All of the flavors! Form them into patties. If you’re using a regular patty, cooking the burgers in the pan with those ingredients will be sufficient.

Herb bails retied onto the backs of beasts! In other words, your burger is gonna be loaded with herbs and garlic.

Herb bails retied onto the backs of beasts! In other words, your burger is gonna be loaded with herbs and garlic.

Next, you’re going to cook them burgers. You can use a non-stick or a cast iron. Personally, I used cast iron but again - either one will work fine.

Get your pan nice and hot and add olive oil. Then add butter. We’re not fucking around here. Then add some of your garlic and onion into the pan. Be careful not to burn that stuff because then your house will be filled with smoke. The wrong kind of smoke.

Bathe in the glow of sunlight’s beating rays! That’s how you could describe this photo probably.

Bathe in the glow of sunlight’s beating rays! That’s how you could describe this photo probably.

Now add your patties into the pan and let them do their thing for a few minutes before flipping them.

One is never enough. Always get a second broth.

One is never enough. Always get a second broth.

After a few minutes, flip the burgers so you get a nice crust on each side. This will come in handy for when you absolutely drench this suckers in gravy later. Add your herbs into the pan. More herbs!

Beautifully caramelized. Raise up seer’s holy prophecy.

Beautifully caramelized. Raise up seer’s holy prophecy.

Once the burgers are fully cooked, remove them from the pan to rest.

If it’s been 25 minutes, check on your turkey things in the oven!

Flip the turkey things and remove the herbs from the pan. Set them aside, don’t throw them out. Put them back in the oven while you prepare other stuff.

Next, it’s time to prepare the other stuff.

What you’ll need:

  • the gravy

  • pretzel buns

  • cranberry sauce

Follow the directions on the gravy you have. You can make your own if you want, but I’m going for convenience here.

Put the packages in warm water and then transfer into a stove-top friendly pouring type thing. Heat up the gravy on a low flame so you don’t reduce it and make your gravy disappear.

Open your can of cranberries. Like the weird jiggly tube shaped ones you remember from your childhood. Not fresh ones! Cut it down into smaller cylinders.

Wipe your pan from earlier down and toast your pretzel buns in there. You want them to be as crisp as possible so they may contain all of the stuff you put atop them.

Finally, that you’re done with all of that - get your turkey things out of the oven. Let them rest for a second. Cut them in half hamburger style. These will sit on top of the burger part of the burger.

The order from the ground up is

Bun, cranberry layer, burger patty, turkey thing.

After you have that much assembled, pour your gravy directly onto the burger and top with one of the pieces of fried sage you didn’t throw out from earlier.

The molten fire flowed up toward Zion! This is where having a crispy bun comes in handy.

The molten fire flowed up toward Zion! This is where having a crispy bun comes in handy.

Now PROCEED to eat!

Now PROCEED to eat!


Black Bean Tortilla Soup

Soup is great because it’s a very passive cooking experience. Also it’s a good way to use up a bunch of ingredients you don’t know what to do with.

As always, if you dig the recipe, tag me at @draggedthroughthegarden on instagram and we can talk about the pros and cons of soup.

Black Bean Tortilla Soup. I used garbanzo beans too but that’s too many words.

IMG_2438.JPG

BLACK BEAN TORTILLA SOUP

prep time: 30 minutes
cook time: 60+ minutes

Disclaimer one: I used lots of garlic and lots of onion.
Disclaimer two: I didn’t take as many pictures because I didn’t initially plan on posting this one.

First, you’re going to prep the base of your soup. Feel free to swap out or alter things to your liking.

What you’ll need:

  • garlic

  • onion

  • olive oil

  • salt

  • pepper

  • chiles (I used de arbol)

  • fresh thyme & sage

Peel your garlic and chop it up. I used an entire bulb of garlic and an entire onion for this recipe. The idea was to clean the fridge out…deliciously. Chop down your onion and set half of it aside for topping later.

Remove the stems of your chiles and remove all the seeds. Keep a few of them in there if you prefer it spicier. I used about five chiles.

Trim the leaves off of your thyme and sage. You can sub out different herbs if you only have different herbs. If you don’t have herbs, you need to keep herbs on deck!

Get out a pot and add some olive oil and heat it up to a medium flame. Add all your stuff into there and toss your ingredients in there. Let them cook for a second, careful not to burn anything. Once you see your garlic start to brown, add a cup of water into the pot. Bring the pot up to a boil and add salt and pepper. Stir it up some and add your herbs in there too.

While that is boiling up, get out your blender cause all that stuff is going in there.

Look, it’s practically soup already!

Look, it’s practically soup already!

Next, you’re going to blend that stuff up and set it aside and get your actual broth started.

What you’ll need:

  • the contents of your blender

  • vegetable broth

  • black beans

  • garbanzo beans

  • whatever beans

  • salt

  • pepper

  • bay leaves

Add your broth into the pot. I used the kind pictured below. If you need to add water at any point for the sake of having more broth, that is a-okay. 32 ounces wasn’t particularly enough for me because I keep sneaking samples so I added water too. Bring the temperature up to boil and add salt.

One is never enough. Always get a second broth.

One is never enough. Always get a second broth.

Drain and rinse your beans. Two cans is perfect, whatever beans you may have chosen. Hopefully you do have black beans.

One can of each, I promise.

One can of each, I promise.

Once your broth is boiling, add the contents of your blender and the beans as well.

Toss a bay leaf in there. Fuck it, put two in there.

Drop the temperature all the way down and put a lid on the pot and let it simmer while you do other stuff.

Next, it’s time to prepare the other stuff. If you have tortilla chips you can use those. If you have tortillas, use those. If you have tostadas, guess what? You can use those too.

What you’ll need:

  • tortillas/chips/tostadas

  • salt

  • pepper

  • olive oil

  • avocado

  • lime

  • cilantro

  • the other half of that onion

Preheat your oven to 350°. On a baking sheet, add a whole layer of whichever kind of corn-derived item you have. If you have tortillas, cut them up first before putting them on the sheet.

Add olive oil, salt and pepper to all of the chips and pop the sheet into the oven for 15-20 minutes. 20 for tortillas and 15 for the other options.

I used el milagros because I buy so many of them!

I used el milagros because I buy so many of them!

And as you can see, I was also seasoning one of my cast irons.

And as you can see, I was also seasoning one of my cast irons.

While those are cooking, stir and sample the soup itself to see if needs any TLC. Just don’t eat it all like I did.

Cut up some avocado. Clean off your cilantro and trim the leaves off of that for toppings. Cut up a lime too for the same purpose.

You can let the soup simmer as long as you want but an hour will suffice. I did it for two because I was cleaning the house.

Once your soup is good to go, add it to a bowl. Pop your chips out of the oven and let them cool off for a moment. Add your toppings into the soup and your tortillas last. Now EAT!

You didn’t even realize I used parsley instead of cilantro. I ran out of cilantro. Radishes would have been cool for this too. Shit!

You didn’t even realize I used parsley instead of cilantro. I ran out of cilantro. Radishes would have been cool for this too. Shit!


Shrimpless Fettuccine Alfredo

You ever use vegan shrimp? They’re strange. But they’re kinda cool. You can get them at Asian supermarkets. If you pick some up, give this a shot.

As always, if you dig the recipe, tag me at @draggedthroughthegarden on instagram and we can talk about getting lost in the sauce.

Shrimpless Fettuccine Alfredo. You can omit the shrimp completely if you want to. But still I think they’re cool.

IMG_2162.JPG

SHRIMPLESS FETTUCCINE ALFREDO

prep time: 20 minutes
cook time: 40 minutes

How many words can you think of that rhyme with “roux”?

This recipe isn’t too difficult, but it requires a fair amount of multitasking. You’re going to start by cooking the vegan shrimp if you’ve got them, making a sauce, getting your pasta ready and then tying it all together.

First, you will cook the vegan shrimp that you found.

Here’s the kind I used.

Here’s the kind I used.

What you’ll need:

  • those vegan shrimp you found

  • olive oil

  • vegan butter

  • salt

  • pepper

Defrost those weird vegan shrimp if need be. Oil a pan and leave it on medium heat. Once the pan is at temperature, add the strange vegan shrimps into the pan. You don’t want to overcook them, just kinda soften them up.

Add a chunk of vegan butter to the pan along with salt and pepper. Don’t be conservative with the butter because this recipe is 3/4 butter.

Feel the shrimp things and see that they’re cooked but not burnt. Transfer them into a bowl for now and come back to them later.

IMG_2108.JPG

Next, you’re going to put your sauce together and boil your fettuccine. You’re going to prepare a roux and then blend together some other stuff. There aren’t cashews in this recipe. To simplify, I’ll break it up into two sections of sauce.

Also, I’m gonna stop using the word vegan now.

What you’ll need:

  • a pot of boiling water

  • fettuccine

  • salt

Bring your pot of water to a boil and salt it. Add your fettuccine and allow it to cook while your make your sauce. The pasta should take about 13-15 minutes so check on it periodically to make sure you don’t overcook it.

If the fettuccine don’t fit, you must acquit!

If the fettuccine don’t fit, you must acquit!

Now for your sauce! First section will be your main ingredients and the second will be the cream.

What you’ll need:

  • olive oil

  • garlic

  • onion

  • butter

  • apple cider vinegar

  • lemon

  • vegan parm (fine, one more time)

  • dried basil

  • dried oregano

  • soy milk

  • salt

  • pepper

  • a blender

Mince up some garlic and dice down an onion. Wipe your pan from earlier and turn the flame back up to medium with some oil. Use lots of garlic. Garlic is good.

Add your garlic and onion into the pan and stir quickly to make sure nothing burns. Add another chunk of vegan butter into the pan. Then toss some salt and pepper in there too. Then add dried basil and dried oregano.

Could probably use more garlic.

Could probably use more garlic.

Take the contents of your pan and transfer it all into a blender.

Grate down a block of parm. Like the whole thing. I used the violife kind. Grate some lemon zest right in there with the parm. You can add lemon juice too for extra acidity. Add all of that to the blender too. Toss a little olive oil in there along with some butter and two tablespoons of apple cider vinegar. This is so your blades don’t get caked with parm and other stuff. And to keep your acidity in check. Once that’s blended, set it aside for now.

Put some miles on that grater!

Put some miles on that grater!

This will eventually get added to the roux you’re going to make next.

This will eventually get added to the roux you’re going to make next.

Now you’re going to assemble your sauce, starting with the roux. Then you will add warm soy milk little by little and then finish by adding the contents of your blender.

What you’ll need:

  • the contents of your blender

  • butter

  • soy milk

  • oat flour (I’m sure other flours will suffice but this is what I had)

  • a microwave

Warm up your pan and throw a big thing of vegan butter in there. To reiterate, this recipe uses lots of butter. Get out your oat flour or whatever kind of bougie flour you have and sift it into a bowl. Always, always sift so if doesn’t get clumpy and difficult to break down.

About equal parts of butter and flour.

About equal parts of butter and flour.

While your butter is beginning to melt down, add some of your oat flour into the pan and stir. You will add the flour little by little to prevent clumping. Use about half of your flour and keep stirring. Once it blended nicely, up the flame to about medium high.

Now you have a roux!

Next, you’re going add warm soy milk to the pan and turn it into a white sauce. Or a béchamel if you want to keep using fancy words.

Put a cup of soy milk into a container and microwave it for 45 seconds. You’re going to warm it up and then add half of it into the pan, again so it doesn’t get clumpy. Keep stirring!

Now take the remainder of your flour and add that into the pan while stirring. Add the second half cup of soy milk into the pan. Take your blender contents from earlier and add that right into your new mixture. Stir that up and drop the flame low and let it simmer for a minute.

Béchamel - ooh la la! Your blender full of garlic, onion, parm and whatever else gets mixed right into the pan.

Béchamel - ooh la la! Your blender full of garlic, onion, parm and whatever else gets mixed right into the pan.

Check on your pasta again and see if it is cooked properly. If so, throw it in a strainer but save a little bit of that precious pasta water. Throw the pasta back into the pot you cooked it in and then add a little olive oil and the big ol’ sauce you just made. Give it a good stir so nothing sticks to the bottom of the pan. Let your pasta sit for a second and then the last step will be chopping down fresh herbs and adding your shrimp.

So creeeeeamy and THICC.

So creeeeeamy and THICC.

What you’ll need:

  • fresh parsley

  • fresh oregano

  • those weird shrimp things

You can use dried for either, but fresh is best.

Remove them from the stems and chop them both up super fine. Like real fine. Once you do that, add it right into your pasta and mix it up. Add your shrimp and mix that up too.

Putting the herb in herbivorous.

Putting the herb in herbivorous.

Now observe as those weird shrimp things get lost in the sauce.

Now observe as those weird shrimp things get lost in the sauce.

Give it a good stir and kill the flame. Serve immediately! This will leave you with quite a bit of fettuccine alfredo. I hope you like carbs!

And look! Background carbs!

And look! Background carbs!


Chimichurri Tempeh

Tempeh is weird. Here’s something fun you can do with it.

As always, if you dig the recipe, tag me at @draggedthroughthegarden on instagram and we can discuss the differences between parsley and cilantro.

Blackened Chimichurri Tempeh. Crisp on the outside, tender on the inside. Just like you.

IMG_2005.JPG

CHIMICHURRI TEMPEH

prep time: 30 minutes
cook time: 60 minutes

With lots and lots of garlic…and herbs.

If this recipe had a video, it would be one of those weird ASMR cooking videos where I make all the food outside and you wonder how I got all those dishes out there.

I’ll break this recipe up into four parts: the marinade, the chimichurri, the baking and searing of the tempeh.

First we’ll start with the marinade.

What you’ll need:

  • garlic

  • onion

  • olive oil

  • coconut aminos

  • liquid smoke (optional)

  • molasses

  • stone ground mustard

  • vegetable broth (or bouillon)

  • salt

  • pepper

  • sage

  • rosemary

  • thyme

Bust open a bulb of garlic. Peel and take the whole thing apart because this recipe uses lots of garlic. Some of it will go into the chimichurri later. Toss a chunk of onion in there too.

The more garlic, the better.

The more garlic, the better.

Once your garlic and onion browns a bit, add a quarter cup of vegetable stock and let it simmer for a second. Transfer the contents of your pan to a food processor and add salt, pepper, two tablespoons of molasses, lots of coconut aminos, sage, rosemary (off the stem) and a generous squirt of stone ground mustard. If you have liquid smoke, throw some of that in there too. The smokiness will shine through the marinade, so add however much you’d like. Also keep this pan handy for later.

It smells better than it looks!

It smells better than it looks!

Blend that mess up and add it all into a ziplock bag. Toss your brick of tempeh in there. Then toss some thyme right into the bag as well.

It’s the……….thyme of the season.

It’s the……….thyme of the season.

Now that your tempeh is in a bag with all that other stuff, throw it in the fridge for now and clean your food processor.

Next order of business will be putting your chimichurri together. It’s very easy, I promise.

What you’ll need:

  • parsley

  • oregano (leaves…but dried is fine)

  • garlic

  • red pepper flakes

  • salt

  • pepper

  • olive oil

  • apple cider vinegar

  • a clean food processor

Rinse off your parsley and separate the leaves from the stems. Little stems are okay but you don’t walk the big stems in there. Toss all of it and the remainder of your garlic from earlier into the processor. Add salt, pepper and a few hearty dashes of red pepper flakes in there too. Take a few leaves of oregano and toss them in there next. If you are using dried oregano, use about the same amount as you did for the red pepper flakes. Add a splash of apple cider vinegar for acidity and then finally add a quarter cup of olive oil.

This photo is sans vinegar and olive oil just so you can see the amount of greenery.

This photo is sans vinegar and olive oil just so you can see the amount of greenery.

If your chimichurri ends up somewhat dry or clumpy, add more olive oil little by little until the consistency is runny but not overly watery. Pretty much just like pesto.

Something like this.

Something like this.

And then like this.

And then like this.

Take your finished chimichurri and put it in the fridge for now. Take your tempeh out of the fridge. You can marinate it longer if you wish, I did it for about 45 minutes.

Next you’re going to bake the tempeh to further soften it up and keep the flavor locked in before searing it. This part is flexible. You can use a baking sheet, a cast iron or any other oven-safe vessel you prefer. I used a cast iron to keep the tempeh marinaded.

What you’ll need:

  • your ziplock bag full of tempeh and other stuff

  • a cast iron (or something else)

Oil your cast iron and set your oven to 350°. Make sure your cast iron is evenly oiled to prevent your marinade from getting all weird. Add the contents of your tempeh bag into the pan. Marinade and all. If you’re using a baking sheet, add some of the marinade directly onto the tempeh and continue to add more every ten minutes or so.

Add that thyme too, thyme is the shit.

Add that thyme too, thyme is the shit.

Once your oven is at temperature, pop that sucker in for thirty minutes. After those thirty are up, flip the tempeh and cook it for ten more. Again, this is to ensure the tempeh is tender on the outside to mirror what will eventually be seared on the outside!

The marinade may clump or caramelize a little bit, if you’re able to baste some of it on top of the tempeh, do that.

Finally, you’re going to take your tempeh out of the oven and oil up a non-stick pan. Use the pan from step one. Oil it up and heat it up on a high flame. This part can be tricky so follow these directions carefully!!!

What you’ll need:

  • your non-stick pan with oil on a high flame

  • agility

  • a cutting board

Once your oil is smoking, add your tempeh to the pan. This will start cooking immediately and also somewhat loudly. Don’t move the tempeh in the pan or else you will lose the crust completely! Let it cook in the pan for about two and a half minutes, keep an eye to make sure a char is forming underneath.

Now you can flip the tempeh and cook the other side out, again leaving it in one spot to prevent the crust from getting stuck to the pan.

Here is a smoky picture of what it should look like after flipping it.

Here is a smoky picture of what it should look like after flipping it.

Once both sides are cooked out, carefully lift the tempeh out of the pan and set it on a cutting board. You’re going to have to let the tempeh rest for about ten minutes before cutting into it. This will keep the outside crisp and the inside tender.

Peep that char!

Peep that char!

After you’re tempeh is rested, cut into it and serve with your chimichurri. You can lay the chimichurri right on top or spoon it onto each individual piece. I wouldn’t recommend dipping directly into the chimichurri just so you don’t get char in there.

Now eat and go finish the rest of your dishes.

Now eat and go finish the rest of your dishes.


Vegan Chicken Noodle Soup

It’s colder out and you want soup. Maybe you’re sick too. Luckily, chicken noodle soup is very simple to veganize.

As always, if you dig the recipe, tag me at @draggedthroughthegarden on instagram so we can talk about pasta.

Vegan Chicken Noodle Soup…with a topo on the side.

IMG_1657.JPG

VEGAN CHICKEN NOODLE SOUP

prep time: 15 minutes
cook time: 60 minutes

With a topo on the side.

This recipe is fairly simple. It’s a very passive recipe so you can clean up the huge mess you made while your soup cooks. First you’re going to prepare your seitan and start your vegetables. For the sake of breaking the recipe up, we’ll start with seitan.

What you’ll need:

  • seitan

  • salt

  • pepper

  • adobo

  • cumin

  • olive oil

  • garlic

  • shallot (or onion)

Open and drain your seitan if necessary. Press it with a towel to remove any excess moisture. Peel up a bunch garlic and cut down your onion. Oil a pan and heat that thang up on a medium flame. You’re going to save some of the garlic for later. Toss in your shallot (or onion) and garlic and stir frequently so you don’t burn it.

The more garlic, the better.

The more garlic, the better.

Add your seitan once your garlic and onion starts to brown some. Add a little extra oil and season it with salt, pepper, cumin and adobo. Stir it up so your onion and garlic don’t burn (again) and let it cook for a second. Once your seitan is cooked, transfer it from a pan to a bowl for now.

If it looks like this, keep cooking it.

If it looks like this, keep cooking it.

Now you can start your vegetables. Everything will cook out right in the broth so no extra boiling water required.

What you’ll need:

  • potatoes

  • celery

  • carrots

  • garlic

  • shallot

  • olive oil

  • a peeler

  • two containers of veggie broth

Peel three medium sized potatoes. Or two large ones. Or four small ones. Then peel three carrots. Rinse your celery off because it’s probably gross. Dice your potato down into small chunks. Dice the carrot and celery down too.

This picture is cropped, there are more carrots and celery. Potatoes too.

This picture is cropped, there are more carrots and celery. Potatoes too.

Hopefully you have garlic from earlier still. If you don’t, dice some more down as well as some onion. These are going to be the first two ingredients in your soup.

Get out your big pot and toss some oil in there. Once it’s hot, add your onion and garlic, again careful not to burn your garlic.

Another picture of onion and garlic!

Another picture of onion and garlic!

Once those things caramelize a little bit, add your two containers of veggie broth. Bring the flame up to the boil so that you can add your potatoes, carrots and celery.

Once your broth is boiling, do the aforementioned. You can keep the flame high for a minute.

To the broth with you! (Add your celery and carrots too.)

To the broth with you! (Add your celery and carrots too.)

Now that your soup is starting to cook, clean up that huge mess you made. Also you can get your seasonings and noodles ready for the next part.

What you’ll need:

  • salt

  • pepper

  • pasta (I used rigatoni)

  • bay leaves

  • water

  • bouillon

  • the seitan you made a few minutes ago

Add salt and pepper into the boiling broth. Add two bay leaves in there too. Don’t eat the bay leaves. Add the seitan into the broth and stir it up. Add your pasta into the broth. I used rigatoni because it’s all we had. And it looks kinda hilarious in the soup. If there isn’t enough broth to accommodate all of your ingredients, add a cup of water and some bouillon. Keep the flame high because you want to boil those noodles and you just added extra water. Once your broth is boiling, drop the flame to low and cover the pot for 25-30 minutes. Now you can simmer the broth and check instagram or clean the rest of your kitchen or something.

After that time has gone by, turn the flame off and give the broth a stir. I think your soup is ready.

Now that’s pretty much it. Eat your soup and be careful not to burn your mouth like I did. Serve with soup or saltines or whatever you wanna eat your soup with.

I mean look how hilariously cartoony those noodles look.

I mean look how hilariously cartoony those noodles look.


Cast Iron Breakfast Tacos

This recipe combines the two major food groups: breakfast and tacos. End of intro.

As always, if you dig the recipe, tag me at @draggedthroughthegarden on instagram so we can talk about our cast iron skillets.

Cast Iron Breakfast Tacos, part of any balanced breakfast

IMG_1553 2.jpg

CAST IRON BREAKFAST TACOS

prep time: 20 minutes
cook time: 60 minutes

To reiterate, the two greatest food groups are breakfast and tacos.

First you’re going to boil some potatoes. So get out some potatoes and boil them.

What you’ll need:

  • potatoes

  • boiling water

Next, you’re going to make a scramble. You can use tofu or Just Egg. For this recipe, I used Just Egg. I’ll add the tofu recipe at the bottom of the page.

What you’ll need:

  • just egg

  • vegan butter

  • olive oil

  • vegan cheese shreds

  • kala namak (black salt)

  • salt

  • pepper

  • nutritional yeast

The things you’re preparing will be transferred to a cast iron, so for now have a regular non-stick pan ready. Heat up some oil in there and shake up your Just Egg. Pour it into the pan and let it cook for a solid 45 seconds before spatula-ing it. Once you do, drop some vegan butter and a generous amount of cheese into the pan. This will help your Just Egg get nice and fluffy. Add salt and pepper and stir. Add kala namak and a big spoonful of nutritional yeast and stir some more.

Fluffy boys!

Fluffy boys!

After your scramble looks like scramble, remove it from the pan and set it aside in a bowl for now. Now you can get your other scramble stuff ready.

What you’ll need

  • onion

  • bell pepper (I used orange)

  • spinach

  • black beans

  • vegan bacon (I used sweet earth)

  • maple syrup

  • salt

  • pepper

  • garlic powder

  • your potatoes from earlier

Starting with your black beans, open them, drain them and rinse them. Set them aside.

Chop up your onion and bell pepper. Set them aside.

IMG_4306.JPG

Wipe your pan from earlier and add a little bit of oil. Throw the vegan bacon in the pan and cook evenly. Add a little bit of maple syrup and pepper and let them cook for an extra 30 seconds.

Look how crispy they look!

Look how crispy they look!

Once your bacon is cooked, set aside.

Assuming your potatoes are cooked, remove them from the water and put them on your cutting board. Chop them up into small chunks. The potatoes will function as the base of your skillet and everything else will be added on top of them.

Add oil to your pan (again) and add your potatoes. Add salt and pepper. Make sure you let them cook thoroughly so they remain crispy when you add other stuff to them later.

Shout out to potatoes.

Shout out to potatoes.

Once your potatoes are nice and crispy, preheat your oven to 400°. Get your cast iron ready with a little bit of oil. Wipe the whole inside of the pan with oil. Not too much though otherwise your potatoes will be swimming. I used a 6.5” skillet for this recipe.

Now that your oven is preheated, throw your cast iron full of potatoes into the oven for now. In the non-stick pan from earlier, you can cook your onions and peppers really quick.

Into the oven you go!

Into the oven you go!

Add oil into your pan and add your onion and red pepper on a medium flame. Add salt and pepper and then add a big fistful of spinach. You’re going to use a good amount of spinach because it will cook out and become tiny spinach.

Once your vegetables are cooked, drop the flame and add your bacon and black beans from earlier. Stir them up.

You don’t have to cook it anymore because the beans will warm up in the cast iron and the bacon is cooked.

You don’t have to cook it anymore because the beans will warm up in the cast iron and the bacon is cooked.

Now pop your cast iron out of the oven and add the contents of your pan right on top of the potatoes. You can add extra cheese too if you wish.

It looks like the same picture but now it’s on top of potatoes! And also very blurry!

It looks like the same picture but now it’s on top of potatoes! And also very blurry!

Now atop this layer, throw your egg right on top of the other stuff.

This picture is much nicer than the other one!

This picture is much nicer than the other one!

Now throw the whole thing back into the oven for about 20 minutes. Check on it every here and there to make sure nothing is burning.

Finally, you’re going to get your tortillas ready. Obviously you could just eat right out of the skillet but tortillas make everything better.

What you’ll need:

  • more olive oil

  • tortillas

  • avocado

  • hot sauce (optional)

Add oil to your pan and cook your tortillas in there. This recipe yields about six generous sized tacos.

Once your tortillas are cooked and your cast iron is ready, throw its contents into tortillas and eat! Garnish with avocado and hot sauce. (well, not really optional)

Now indulge in the wonderful texture of breakfast tacos.

Now indulge in the wonderful texture of breakfast tacos.


If you use tofu instead of Just Egg,

Press your tofu to drain it of all liquid. Heat up oil in a pan and crumble tofu into the pan. Add vegan butter and cheese and stir, stir, stir! It’s pretty much the same process. Just with a somewhat different texture. Add salt, pepper, nutritional yeast and kala namak the same way you would with Just Egg.

Love you,
Joe


Jackfruit Chilaquiles

Chilaquiles are a top-tier breakfast dish. I would eat them every day if I could. The trick to leveling up your vegan chilaquiles is scrambling up tofu as an egg substitute instead of just omitting it.

As always, if you dig the recipe, tag me at @draggedthroughthegarden on instagram so I can personally tell you I love and respect you.

Jackfruit chilaquiles. They are crispy, smoky, gooey and at least six other adjectives.

IMG_1319.JPG

JACKFRUIT CHILAQUILES

prep time: 20 minutes
cook time: 30 minutes

Chilaquiles are the perfect breakfast food but you’re an adult, you pay taxes and you can eat breakfast whenever you damn well please.

First order of business is pressing your tofu and jackfruit. In due time, I’ll put together a little blurb on basic stuff like prepping tofu and jackfruit, that would be kinda cool.

What you’ll need:

  • extra firm tofu

  • jackfruit (canned)

  • some towels

  • a cast iron or some kind of heavy object

Drain your tofu and wrap it in paper towels. Put a cast iron (or something else) on top to drain it of liquid.

Open your jackfruit, rinse them off in a strainer and then add them to another paper towel. Wrap that paper towel in a regular towel and press down and try to shred the jackfruit to the best of your ability. Remove the seeds if you want.

While those two things dry off, you can prepare your salsa.

What you’ll need:

  • dried chilies (ancho, guajillo and de arbol)

  • garlic

  • onion

  • lime

  • salt

  • pepper

  • cumin

  • olive oil

  • vinegar

Remove the seeds from your dried chiles. You can cut the stems off with scissors and they usually fall right out pretty easily. I leave a couple of the seeds just for heat sake but that’s entirely up to you.

Cut up an onion and some garlic. You don’t have to mince them because they’re eventually getting blended. Use as much garlic as you want too. I always use a lethal amount of garlic, but you can add as much as you’d like.

In a small pot, heat up some oil on a medium flame and add your salsa ingredients. Stir them and add salt, pepper, cumin and the juice of half a lime. Then add a splash of vinegar.

You can smell this picture!

You can smell this picture!

Once your kitchen smells like chiles and garlic, add half a cup of water to the pot and bring the temperature up a little more. Turn off the flame after simmering the pot for a few minutes and transfer the contents to a blender. Blend until smooth and let it cool down a little bit. If it’s too thick and getting caked on the blades, add a little bit more water.

Look at that color!

Look at that color!

Take your jackfruit from earlier and put it into a container and add the salsa directly onto the jackfruit.

You can sneak a bite, it’s cool.

You can sneak a bite, it’s cool.

Now that your prep is done, we can get into the main components of the dish. First you will start with the tofu. The tofu will function as a scrambled egg.

What you’ll need

  • pressed tofu

  • vegan butter

  • salt

  • pepper

  • kala namak (black salt)

  • nutritional yeast

  • vegan cheese shreds

  • olive oil

Oil a pan and bring it up to medium heat. Crumble your tofu directly into the pan.

Like this!

Like this!

Add salt, pepper and a big ol’ heaping scoop of nutritional yeast to your tofu. Stir, stir, stir.

Add a tablespoon of vegan butter into the pan along with a fistful of vegan cheese shreds. These two items will bring on more of a scramble-like consistency and alter the color some. Add a big pinch of kala namak to the tofu. This adds a sulfuric element to the tofu to give it more of an egg-like taste.

Now your tofu has more of a gooey, eggy consistency rather than being dry and crumbly.

Now your tofu has more of a gooey, eggy consistency rather than being dry and crumbly.

Once your tofu is cooked, set it aside for now. Next you will get your tortillas ready and toppings ready. When your pan isn’t so hot, give it a quick wipe.

What you’ll need:

  • corn tortillas

  • olive oil

  • red onion

  • cilantro

  • vegan sour cream

  • vegan block of cheese (I used violife parm)

  • avocado (optional)

  • salt

  • adobo

Stack your tortillas up and cut them into quarters.

Don’t be tempted to eat them dry. Maybe just one. It’s not gonna be great though.

Don’t be tempted to eat them dry. Maybe just one. It’s not gonna be great though.

Heat up some oil and throw in a few tortillas at a time so they can cook. Flip them and continue to add more. Once they are cooked, set them on a paper towel on a plate to dry. I used about six tortillas for this part.

Okay now you can eat one.

Okay now you can eat one.

While your tortillas cool off, rinse off some cilantro and chop it up. Use some of your red onion and chop that up too. Diced this time unlike the salsa. Put some vegan sour cream into a dish. Vegan sour cream has a weird consistency but I’ve found if you take some in a dish and microwave it for ten seconds, it becomes much easier to whip. Cut up some limes and get out your block of vegan cheese. I used the brick of violife parm. I don’t know if vegan cojita exists yet.

Grate down the cheese into another dish.

Now that everything for your chilaquiles is ready to go, bring it all together. Take your jackfruit/marinade and toss it into the pan with a little bit of olive oil. Season with a little bit of salt and adobo.

Let the jackfruit cook more a little bit. You want a little bit of char.

Pre-char.

Pre-char.

When your jackfruit is cooked, add your tortillas directly into the pan. Mix them up evenly with the jackfruit until everything in the pan is red.

Now add all your tofu into the pan. Stir everything up evenly!

Tofu egg, tortillas, jackfruit.

Tofu egg, tortillas, jackfruit.

Let those things cook in the pan together for a minute and then you can transfer to a plate. Garnish with the toppings from earlier and EAT!

You earned every last bite of these chilaquiles.

You earned every last bite of these chilaquiles.


Tofu Jibarito

Plantains are like bananas’ super cool cousin you only see on holidays. I love you bananas, but today plantains are in town.

As always, if you dig the recipe, tag me at @draggedthroughthegarden on instagram so I can personally tell you I think that you are as cool as plantains are.

Tofu Jibarito. It’s nothing like banana bread!

IMG_1125.JPG

TOFU JIBARITO

prep time: 15 minutes
cook time: 30 minutes

Plantains and bread are like super distant cousins I guess.

Get out a brick of tofu and drain it. Press it with some towels with a cast iron skillet on top to drain it of excess liquid.

Then you’ll start with your plantains. You’re going to fry them twice. I’ll explain.

What you'‘ll need:

  • olive oil

  • green plantains

  • garlic powder

  • salt

Chop the two ends off of your plantains. Use your knife and slice them long way and butterfly them open.

Cut them along the inside curve.

Cut them along the inside curve.

Once you’ve done that cut them in half. And then cut them long ways as pictured below.

Now pictured above!

Now pictured above!

Put a lot of oil into a pan and get it hot. Once your oil is hot, using tongs, drop each plantain into the oil. Cook them on both sides. You want them to get a golden, brown color. This should take about five minutes.

I did a couple of extras in case I messed up.

I did a couple of extras in case I messed up.

Once your plantains look golden, put them on a plate with paper towel to drain them of excess oil. When they are dry, use your cast iron skillet from pressing the tofu earlier and smash them down so they flatten. Do this without breaking them. This is so your plantain will hold more of a bread-like shape.

If you do it right, they will look something like this.

If you do it right, they will look something like this.

Add a little more oil back into the pan. Once your plantains have cooled a little bit, add them back into the oil for five more minutes. This, again, will function as the bread of your sandwich. While they’re in the oil, season them with a little bit of salt and garlic powder.

Once they’re cooked, remove the plantains from the oil and put onto another paper towel-ed plate to dry and rid of excess oil.

Look at these bread shaped things!

Look at these bread shaped things!

Get some of the excess oil out of the pan, next you’re going to cook your tofu in it. Cut your tofu into even rectangles that resemble a thick piece of lunch meat or something. While you’re doing this, you can also cut your onion down.

What you’ll need:

  • drained tofu from earlier

  • onions

  • salt

  • pepper

  • cumin

  • chili powder

  • garlic powder

Add them to the oil carefully and season with salt, pepper, cumin, chili powder and garlic powder. Cook them evenly on each side without them getting too crispy. Cut down an onion into long pieces, not dicing it. Add your onion right in with the tofu.

Like so!

Like so!

Once your onions are caramelized and your tofu is cooked but still somewhat tender, throw them all onto another paper towel to drain of oil.

Next you can prepare your toppings.

What you’ll need

  • vegan mayo

  • sriracha

  • chili powder

  • lettuce

  • tomato

  • vegan cheese slices

  • cilantro (optional)

  • avocado (optional)

Mix one part sriracha to two parts vegan mayo. Add a little chili powder and mix.

Cut a tomato and some lettuce down. Cilantro and avocado too if you chose to include them.

Cut your slices of vegan cheese to size with the tofu and add to each of them. To help melt it down a little bit, you can microwave them all for about 30 seconds.

Now using your plantains as bread, assemble a sandwich using your tomato, lettuce, caramelized onion, tofu/cheese, cilantro and onion. On the top plantain that would function as the top slice of bread, apply the sriracha mayo.

Look, it’s like a sandwich kinda!

Look, it’s like a sandwich kinda!


You can serve the sandwich with rice and beans. I used rice spiced with sazon goya and added black beans and cilantro.

IMG_1130.JPG

Black Garlic Mozz Lasagna

Lasagna takes time. But that time is well spent because the reward is lasagna.

Hunt down @cheezeandthankyou and buy her black garlic mozz. I used that and kite hill ricotta. You can use other vegan mozz, but it probably won’t be as good. But if you’re located elsewhere, you are forgiven. A link to her page is listed below.

As always, if you dig the recipe, tag me at @draggedthroughthegarden on instagram so I can personally tell you I think that you are doing a great job.

Black Garlic Mozzarella Lasagna. I require lasagna, Jon.

image6.png

BLACK GARLIC MOZZ LASAGNA

prep time: 30 minutes
cook time: 70 minutes

Layers upon layers of delicious carbs and other things.

Get out your meat substitute and let it defrost. Because first, you gotta make a sauce.

What you'‘ll need:

  • olive oil

  • vegan butter

  • shallot (or red onion)

  • garlic

  • salt

  • pepper

  • oregano

  • tomato (beefsteak preferably)

  • arrabbiata sauce

  • tomato paste

  • patience

Dice up your shallot and mind your eyes. Onion works fine too. Mince up some garlic too. As much as you want. The more the better. Don’t add all of it to the pot because some of it will be utilized later.

Here are those things.

Here are those things.

Get out a big pot and toss about three tablespoons of vegan butter in there. Normally I use miyoko’s but she still hasn’t hooked me up with a sponsorship so today it’s earth balance w/ olive oil. Keep the flame below medium so you don’t burn your garlic or your shallot…or onion. Throw a nice pull of olive oil in there too and mix it around. Add salt, pepper and about two teaspoons of oregano.

Here are those things again, but in a pot!

Here are those things again, but in a pot!

Let it simmer some and then add tomato paste and Arrabbiata sauce. Then dice up your tomato and throw that in there too. Bring the flame up a little bit after you add these things and throw a lid on the pot. While your sauce cooks out, you can prepare the other layers of your lasagna.

Here are the kinds of saucy stuff I used.

Here are the kinds of saucy stuff I used.

Now that your sauce is cooking, we can start with your protein. Any type of ground substitute works fine. I really like the Meatless Farm brand. Beyond works too.

What you’ll need:

  • the remaining garlic and shallot from earlier

  • plant-based protein

  • salt

  • pepper

  • olive oil

  • vegan butter

  • cumin

  • coconut aminos

  • oregano

  • black garlic mozz (via @cheezeandthankyou. or just black garlic and vegan mozz)

Assuming your protein is defrosted, oil a pan and keep the heat low. add your garlic and shallot (or onion) from earlier. Add your protein into the pan and mix it with the garlic and shallot as best as you can.

Turn up the heat and then add vegan butter. Season with salt, pepper, cumin and oregano. Add about two tablespoons of coconut aminos. Let it cook out and prepare your vegan mozz. Again, I sourced mine from @cheezeandthankyou but if you cannot, mince down some black garlic and combine it with vegan mozz. To soften the cheese a little bit, put it in a container and microwave for about 15-20 seconds.

Once your protein is all cooked, transfer three fourths of it into a bowl. The remaining fourth will go right into your sauce you are currently simmering. Let the protein rest in the bowl for a minute and then throw half of your mozz into there and mix it up. If you have gloves on hand, use gloves and mix it with your hands.

The protein mixture with a some of the cheese mixture

The protein mixture with a some of the cheese mixture

Your next layer is easy. Spinach and ricotta.

What you’ll need

  • spinach

  • ricotta

Rip up a bunch of spinach and mix it with vegan ricotta. I used kite hill. And again, if you have gloves to use, use them and it will make your life easier.

Such an easy life because of gloves!

Such an easy life because of gloves!

Now finally, we can assemble your lasagna in whole. This part also requires patience. But again, in the end, you are awarded with lasagna. Preheat your oven to 350°.

What you’ll need:

  • the aforementioned mixtures

  • lasagne

  • olive oil

  • butter

  • a casserole dish

  • tin foil

Take your casserole dish and put some olive oil in it. Coat the inside of the dish as much as humanly possible. Add some vegan butter and do the same thing. This is so your lasagna won’t get stuck to the sides and get all gross.

In a strainer, put your lasagne pasta in it and run hot water on it. You’re using the no-boil method because you want the lasagne to cook out within the sauce itself. Once your pasta is less starchy, add them to the bottom of your casserole dish to create a layer. If you need to trim the pasta down a little bit, that’s fine. I used scissors.

Look how nice they look!

Look how nice they look!

Now upon your first layer of pasta, add your mozz. This will function as a delicious adhesive for the above layers.

Next, turn the flame off your sauce and add that right atop your mozz layer.

Quick disclaimer: if your sauce seems too runny, even after adding the protein to it, sift a little bit of flour into there. Oat flour would be my call.

Then atop your saucy layer, add your spinach ricotta mix.

Pasta, cheese, sauce, ricotta, pasta

Pasta, cheese, sauce, ricotta, pasta

Now add one more layer of lasagne as pictured above.

After that, add your protein/mozz mixture and then add more sauce. You can add a little more cheese if you would like.

Cover it with foil and pop it in the oven for an hour.

Disclaimer Two: If after an hour, the lasagna is still soupy, let it rest in the fridge overnight and it will be perfect the next day. Just have snacks ready in the meantime.

After an hour, remove the foil and switch the oven setting to broil and let it cook for a few more minutes.

Let the lasagna rest, whether for thirty minutes or overnight if you have to.

I went this entire recipe without saying the word “Garfield.”

Did I crack in because I was impatient? Or was it so I could showcase the layers?

Did I crack in because I was impatient? Or was it so I could showcase the layers?


Here’s a link to @cheezeandthankyou. Go get some vegan cheese from her.


Eggless Pad Thai

Pad Thai is an awesome dish. In making it vegan of course, you omit the egg. But my trick for taking vegan Pad Thai to the next level is using a vegan egg substitute. Makes sense right? I’ve never seen it done in a recipe before, so I’ll show you how to take that shit to 11. Get one block of tofu, use half for your protein and the second half gets scrambled and mixed with the noodles.

As always, if you dig the recipe, tag me at @draggedthroughthegarden on instagram so I can personally tell you I am very proud of you.

Eggless Pad Thai. Double Tofu Pad Thai just sounds like paying an extra $2.50 at Noodles & Company.

IMG_0477.jpg

EGGLESS

PAD THAI

prep time: 30 minutes
cook time: 35 minutes

I promise you won’t die from eating soy.

First, we’re going to take your block of tofu and use half of it for an egg substitute. You can use Just Egg for this part if you really want to, but now your another eight dollars in the hole. Don’t cut the tofu up yet, keep reading.

What you'‘ll need:

  • tofu

  • olive oil

  • salt

  • pepper

  • nutritional yeast

  • kala namak

  • vegan butter

  • garlic powder

Press your block of tofu and drain it of all liquid. Afterwards, cut your block of tofu right down the middle. You’re essentially going to be making a scramble with the first half of the tofu. Oil a pan and crumble your tofu in there. Add salt, pepper, a little bit of garlic powder and half a tablespoon of kala namak. Kala Namak is also called “black salt” and will add a sulfuric element to your tofu egg. Add two tablespoons of vegan butter right into the pan. You want the scramble to be on the creamier side.

The vegan butter will keep the tofu on the softer side.

The vegan butter will keep the tofu on the softer side.

Now optional, you can add a little bit of vegan cheese or turmeric to the tofu egg if you want. Don’t worry, your tofu won’t taste cheesy once it’s mixed in, it’s more to achieve texture than anything.

Once your tofu egg is cooked, set it aside on a plate. Turn off your flame and let the pan cool for a second. Once it’s safe, give it a wipe and a quick rinse if necessary. The less dishes we use, the better.

Now to prepare the second half of the tofu, cut it down into cubes. Or any shape you want. Cubes are easy but if you can carve out little hearts, that would be badass

Not hearts, not nearly as badass.

Not hearts, not nearly as badass.


Now oil your pan again and we’re gonna cook these thangs.

What you’ll need:

  • tofu cubes

  • garlic

  • salt

  • pepper

  • red pepper flakes

  • coconut aminos (or soy sauce)

Cut up some garlic and mince it down as finely as you can. You don’t absolutely need to, but everything is better with garlic. Add the cubes and let them cook out. You want them to be firm and somewhat crispy. Once they are added to the noodles, you want them to keep their texture and not get all mushy.

Add your seasonings and add a generous amount of coconut aminos. Lots of coconut aminos will be used so apologies in advance if you drain your entire bottle.

Keep cooking for a little bit after they look like this, you do kinda want to burn them.

Keep cooking for a little bit after they look like this, you do kinda want to burn them.

Once your tofu cubes are cooked, set those aside too. You can put them on the same plate as the other tofu if you want. Next, you will add vegetables to your dish. I used broccoli and I forgot to buy red cabbage.

What you’ll need:

  • broccoli

  • red cabbage (optional I guess)

Using the same pan, toss your broccoli in there and cook it for a little bit until it starts to brown a little bit. You can add any of the previous seasonings if you want. Once the broccoli looks desirable, add red cabbage (if you remembered to buy it) and toss it a little bit then remove them both and set aside.

Now you’re going to get your rice noodles ready. This part doesn’t take that much time because you want the noodles to remain somewhat firm and not get all coagulated.

Follow the directions on your noodles. They only took about 6-7 minutes for mine to cook out. First, we will start with the noodles and then work our way into the garnishes.

What you’ll need:

  • rice noodles

  • olive oil (or sesame oil/peanut oil)

  • coconut aminos

  • garlic

  • teriyaki sauce (or a homemade sauce, which I will list below)

  • sriracha paste

  • peanut butter

  • limes

Here is a picture of the noodles cooking. Not much to see here.

Here is a picture of the noodles cooking. Not much to see here.

Boil some water in a pot. Add salt to the water and cook the noodles as stated previously. Once they are cooked but still firm, set them aside. Eventually everything will come together in the pan that we started with.

Now in that same pan I keep talking about, add a little olive oil (or sesame oil/peanut oil) and add lots of coconut aminos. You probably went through most of the bottle by now. Add about a little less than a cup of teriyaki sauce right into the pan on a low flame.

If you want to make the sauce yourself — vinegar, coconut aminos, brown sugar, sriracha, peanut butter, garlic, ginger, lime. If you can’t summon your sauce directly from hell, store-bought is fine.

Once your sauce is simmering some, stir frequently and add peanut butter. About a tablespoon and a half. Mixing the peanut butter kinda sucks so just keep stirring. You can add a little oil to help break the peanut butter down. Add half a tablespoon of sriracha paste and a squeeze of lime juice into the mix. Keep stirring! Regular sriracha is fine if you don’t have the pasty stuff. Once your sauce is nice and smooth, toss your noodles right into the pan. Have your flame as low as possible.

Coat your noodles with the sauce to the best of your ability. After your noodles are evenly mixed in, toss in your tofu egg from earlier. The tofu may be somewhat dry but the sauce in the pan will help rehydrate it. After your tofu egg is mixed in, add your broccoli and whatever other vegetables you want to add.

Now you can add the tofu cubes directly into the mix or toss them on top. I did the latter so you could see them in the picture. Whether you did or not, leave your noodles in the pan and you can get your garnishes ready. Toppings. Whatever.

What you’ll need:

  • crushed peanuts

  • bean sprouts

  • lime

  • cilantro

  • sriracha

  • tofu cubes (if you didn’t mix them in)

Rinse and dice up your cilantro. Prepare your bean sprouts. I wanted fresh ones but couldn’t find any. I bought canned ones in the same aisle the rice noodles and teriyaki were in. So like anything else that comes in a can, drain and rinse them and set aside for now. Cut up some limes. Get your crushed peanuts out from wherever you keep your crushed peanuts in the house. If you don’t have crushed peanuts, put regular peanuts in a bag and crush them yourself. No need to get your food processor dirty.

Now that your toppings are ready, plate (bowl) your noodles. Add your tofu cubes if you haven’t already, toss some cilantro, crushed peanuts, bean sprouts and sriracha right on top.

Make sure you wipe the sides of the bowl with a paper towel if you want those instagram likes.

Make sure you wipe the sides of the bowl with a paper towel if you want those instagram likes.


Lentil Liver with Fava Beans (and a nice Chianti)

Would you eat this? I’d eat this. I’d eat this so hard. It looks less than charming but I promise it is very tasty. Also good luck finding fava beans. I got the canned red ones at the grocery store after looking for thirty minutes. Also lots of Chiantis are not vegan so use Barnivore to cross-reference. Castello Di Albolda is vegan.

Lentil Liver with some Fava Beans and a nice Chianti…without drinking blood or eating flesh.

IMG_0340.JPG

LENTIL LIVER WITH SOME FAVA BEANS AND A NICE CHIANTI

prep time: 20 minutes
cook time: 25 minutes

First order of business will be cooking the lentils. Cooking this requires one pot and one pan. And then a food processor. But we’ll start with the lentils.

What you'‘ll need:

  • lentils

  • boiling water

  • fava beans (canned)

Cook your lentils according to the directions on the package. One cup of lentils per two cups of water. After you cook them, strain the lentils and set them aside for now. Drain and rinse your fava beans off. Fill the pot with water again and bring it back to a boil. Put your fava beans in there on a medium flame. The goal is to soften them up so the outer skin comes off the beans nice and easily.

Next we are going to construct the “liver.” It’s more of a pâté than anything but I don’t want to have to type those symbols over and over again.

What you’ll need:

  • garlic

  • olive oil

  • onion

  • coconut amios

  • baby bella mushrooms

  • lemon

  • apple cider vinegar

  • walnuts (one cup)

  • eventually, the lentils

  • a food processor

  • parsley

  • crackers

Dice up your onion into chunks along with your garlic. They don’t have to be fine because they’re going into the food processor. Rinse and dice your mushrooms too. Oil your pan and put your garlic and onion in there. After they start to caramelize a little bit, add your mushrooms. Once the mushrooms start to soften and brown some, add your walnuts into the mix. Bring the flame up a little bit and toss everything around in the pan.

Walnuts added once the onion and garlic cook out alongside the mushrooms.

Walnuts added once the onion and garlic cook out alongside the mushrooms.

After the walnuts cook a little bit, throw your lentils right into the pan. Add a splash of apple cider vinegar, a bit of lemon juice and a good couple of shakes of coconut aminos. Soy sauce works fine. Bring your flame back down a little so your lentils don’t get all weird.

Way more appetizing than having an old friend over for dinner….sorta?

Way more appetizing than having an old friend over for dinner….sorta?

Now it puts the mixture in the food processor or else it gets the hose again.

For real though, put all of that stuff into your food processor and pulse until smooth. Not like hummus-smooth but still pretty smooth. Add a little olive oil and coconut aminos if your mixture is too solid.

Scrape the mixture into a bowl for now and let it cool down for a second. Now we’re going to revisit those pesky fava beans. Remove the skins from each one. Some of them will be easier than others. But for the most part, the skin should just slip right off. tftftftftftftftftftf.

The right sides are the skin. The left are the beans. Quid pro quo or something.

The right sides are the skin. The left are the beans. Quid pro quo or something.

Once you have that completed, plate your ugly, brown chopped liver lentil thing with your fava beans. Dice up what’s left of your onion along with some parsley. Garnish the weird pile of brown stuff with the onion and parsley. Serve with crackers. Now open up that nice Chianti.

Please don’t invite over the census taker.

Please don’t invite over the census taker.


Seitan Tacos Al Pastor

Pineapple on pizza is a touchy subject. Pineapple on tacos al pastor: no brainer. For the record, I don’t mind having pineapple on pizza because I’m an adult and I pay taxes and have bigger issues. If you like what you see, follow along on instagram — @draggedthroughthegarden.

Tacos al pastor. But with seitan. Smoky, tangy, dense with flavor and textures. Hold onto your guajillos.

IMG_0212.JPG

SEITAN TACOS
AL PASTOR

prep time: 50 minutes
cook time: 20 minutes

First order of business, constructing a marinade.

What you’ll need:

  • onion (white or red)

  • dried guajillo peppers

  • achiote powder

  • garlic

  • cumin

  • oregano

  • salt

  • pineapple

  • lime

  • apple cider vinegar

  • a blender

The marinade is going to eventually make its way into the blender so you don’t have to mince your garlic down or chop the onions super fine.

Take four or five of your dried guajillo peppers and cut the stems off. Scissors work fine. Remove all the seeds from the inside. You can butterfly the pepper open, that way works fairly easily.

Decapitate those chiles!

Decapitate those chiles!

Grab a pot and toss some oil in there. Add your onion and garlic chunks in there and let them do their thing for a minute. Put your deseeded guajillos in there and a fistful of pineapple chunks. I bought them pre-cut because time. Add lime juice and a splash of vinegar into the pot. Once it starts to cook a little bit, add about a half cup of water and turn the flame up. Add achiote powder (or paste) as well as a tablespoon of oregano and cumin. Salt to taste.

Once everything in your pot is soft and your kitchen smells like garlic, onion and peppers, turn off your flame and transfer your mixture into a blender. Pulse until smooth and add a little more water if it’s too thick.

Here is a pot full of soft, smelly ingredients. The achiote will give it that orangey red color.

Here is a pot full of soft, smelly ingredients. The achiote will give it that orangey red color.

Get a load of that consistency! It looks hot but it’s pretty mild.

Get a load of that consistency! It looks hot but it’s pretty mild.

Let your mixture sit for a second and you can get your seitan ready. You’re only gonna add salt and lime directly to the seitan because the marinade will carry all of the flavor anywho.

What you’ll need:

  • seitan

  • salt

  • lime

  • a ziplock bag

This is the brand I used. You can use whatever you like.

This is the brand I used. You can use whatever you like.

Drain and rinse your seitan off. Get It as dry as humanly possible so it soaks up all of the marinade when its marinading time. Then toss some salt and lime on there.

Cut down all the obnoxious chunks if need be. You can do that later too if you want.

Cut down all the obnoxious chunks if need be. You can do that later too if you want.

Now that your seitan is dry, throw it in a ziplock and pour the marinade directly in there too. You’re going to let it sit in the fridge for an hour. You can marinade it longer if you want, I did it for two while I ran errands.

Into the fridge you go!

Into the fridge you go!

Now that your seitan is marinaded…..prep your garnishes.

What you’ll need:

  • more pineapple

  • cilantro

  • onion (whatever you started with)

  • lime

  • salt

Oil a pan and add pineapple. I cooked them as rings and cut them down afterwards. Whatever you wanna do is fine. Give them a nice char on each side and then remove them from the pan and set aside.

Dice up some onion into finer chunks than you did for the marinade. Rinse and dice up some cilantro as fine as you can too. Cut up some limes.

Fix-ins!

Fix-ins!

Put each of your garnishes aside for now. You can put them in the fridge if you’d like.

Now to cook the seitan and bring it all home.

What you’ll need:

  • your marinaded seitan

  • salt

  • oil

  • tortillas

  • an appetite

Using the same pan you cooked the pineapple in, add some more oil and then slowly add your seitan into the pan on a medium high flame. The sauce will reduce down a little bit as you continue to sear. Stir it around and cook evenly.

After your seitan looks like al pastor, set it aside on a plate to rest. Or a cutting board from earlier. Less dishes the better.

Look how well rested the seitan is.

Look how well rested the seitan is.

Cook your tortillas with oil in the same pan. This recipe yields five tacos. Hearty tacos. There’s only four in the picture because I got hungry.

Now put your seitan in a tortilla with the garnishes from earlier and sulk in the fruits of your labor.

Stunning. I am proud of you.

Stunning. I am proud of you.


Lobster-less Rolls

Lobster Rolls are like New Englander hot dogs. That’s about as close an analogy I can get. Omit the crustacean aspect, and now you have a cruelty-free, delicious kind of weird sandwich hot dog thing.

Lobster Rolls, sans lobster: Jackfruit is versatile and you don’t have to source it from a coastal state. But you do have to buy nori.

IMG_0083.JPG

LOBSTER-LESS ROLLS

prep time: 25 minutes
cook time: 25 minutes

Before jumping right into the jackfruit, we’re gonna lay a saucy foundation.

What you’ll need:

  • red onion

  • chives

  • parsley

  • dill

  • celery

  • apple cider vinegar

  • smoke paprika

  • old bay

  • lemon

  • vegan mayo

Rinse off all of your ingredients that need rinsing. Particularly that celery. Trim your parsley off the stems and dice it down as fine as you can. Dice the chives down too. And then the red onion. Then dice the dill down too. Again, as fine as you can get it. Now take your presumably clean celery and slice it down as thinly as possible. You can use a mandolin too if you have one but be careful!

Look how fine everyone looks!

Look how fine everyone looks!

Once all that stuff is chopped up, toss it into a bowl. Add about two tablespoons of smoked paprika and two tablespoons of old bay right into your dry mixture. Add one tablespoon of apple cider vinegar and then add a generous squeeze of lemon juice into there. Mix it up a little bit and then toss in three tablespoons of vegan mayo. And as always, I’m going to stop using the word vegan now and all the ingredients will be implied vegan.

Dry mixture without the aforementioned fix-ins.

Dry mixture without the aforementioned fix-ins.

Once your mixture is ….mixed, put it in the fridge for now so it can solidify a little bit.

Now, you can prep your jackfruit.

What you’ll need:

  • two cans of jackfruit

  • olive oil

  • garlic

  • nori

  • smoked paprika again

  • salt + pepa

Drain the two cans of jackfruit, rinse them and dry them off. Try to break them down as much as you can but without getting them mushy and weird.

Pulled apart but still with some texture to it. Remove the seeds if they bother you. They don’t bother me.

Pulled apart but still with some texture to it. Remove the seeds if they bother you. They don’t bother me.

Mince up some garlic and oil a pan on a medium flame. Put the garlic into the pan and let it cook out a little bit. Add the jackfruit from the pan and toss it around with the garlic. Then comes the weird part. Take a sheet of nori and break a piece off. Chop it down as fine as you can. This part sucks because the nori is sticky. But it will add a “seafood” like taste to the dish. Add it to the jackfruit and then add salt and pepper. And then smoked paprika. As much as you want, you earned it.

After your jackfruit is cooked, turn off the flame and let it rest in the pan. Once it cools, you can add it directly into your cold mixture from earlier.

Add your chocolate to the peanut butter. Wait!

Add your chocolate to the peanut butter. Wait!

Put your wet jackfruit mixture in the freezer for the duration of the next part. The next part is prepping the bread.

When you remove it from the freezer, it’ll look like this.

When you remove it from the freezer, it’ll look like this.

For the bread, you can use a soft roll / hot dog bun / potato roll / sub roll. The sub roll was the best choice in my opinion. Just make sure there aren’t any pesky dairy ingredients all up in there.

What you’ll need:

  • sub rolls (or any of the aforementioned)

  • butter

  • an oven set to 350°

  • a brush

Preheat your oven to 350°. Use a knife and cut a slit in the top of the roll. Melt down your butter and apply it very generously to the entire roll. Inside and outside. Repeat that process for as many rolls as you want to use. This recipe yields about four rolls. Probably more if you use hot dogs buns.

They kinda look like potatoes!

They kinda look like potatoes!

Bake them in the oven for 10 minutes. While they are baking, take your jackfruit out of the freezer because you are going to apply the cold mixture to a hot bun.

Optional side dish: You can serve these vegan lobster rolls with fries, chips, or some kind of slaw. I chose some kind of slaw and if you are interested, it’s a bag of slaw from the grocery store with mayo, lemon, old bay and chickpeas.

Assuming you cut up too much parsley, throw some of them shits on top for garnish and eat! Also there’s that slaw back there. Slawing it up.

Assuming you cut up too much parsley, throw some of them shits on top for garnish and eat! Also there’s that slaw back there. Slawing it up.


Vegan Gouda Mac

Do you like mac & cheese? Do you really like gouda mac & cheese? Do you wish you could make it vegan? Do you live in Chicago or the Chicagoland area? If you answered yes to these questions, you are in luck. This is a non-difficult recipe because I’ll pretty much be walking you through how to make vegan mac & cheese without the box.

Hunt down @cheezeandthankyou and buy her smoked ground mustard vegan gouda. I used that and exclusively that for this recipe. You can use other vegan cheese, but it probably won’t be as good. But if you’re located elsewhere, you are forgiven.

(Gouda) Vegan Mac & Cheese: twangy, funky and dairy-free.

C1581D2C-56D6-4920-B74E-702898AA634B.jpg

VEGAN GOUDA MAC

prep time: 10 minutes
cook time: 30 minutes

Check out @cheezeandthankyou and see when/where she is setting up shop at different events in and around Chicago.

Now disclaimer for this recipe, I prepared buffalo fried oyster mushrooms as the side, exactly like the ones from the chicken & waffle recipe. If you are interested in preparing that as well, the link to that recipe is at the bottom of this page.

What you’ll need:

  • vegan smoked gouda (via @cheezeandthankyou ….or a different kind if you’re elsewhere)

  • cavatappi (other pasta works fine but cavatappi is king)

  • vegan butter

  • vegan unsweetened creamer

  • shallot

  • olive oil

  • smoked paprika

  • green onion

  • bread crumbs

Get out a pot and put some water in it. Bring it to a boil and toss some salt in there. After your water is boiling, add the appropriate amount of pasta to the water. You know, one part pasta :: two parts water. Stir frequently to make sure it doesn’t get all clumpy and weird. Lower the flame a little bit too.

Take your good knife and dice up half of a shallot. And some green onion too for later. Throw your diced shallot into a pan with olive oil. You can use an onion too if you don’t have a shallot. After the shallot looks caramelized, toss it all into a small bowl for later.

Have your vegan cheese ready. The vegan gouda I used was a brick, so grate it down so it will be easier to stir in. If you have shreds or slices, cut them down and set them into another small bowl. Add a little bit of vegan butter to the bowl and microwave it very briefly. This will help stir it as well.

Delicious hunk of vegan gouda, diced shallots and green onions.

Delicious hunk of vegan gouda, diced shallots and green onions.

After your pasta is cooked, put it in a strainer to drain it but save a little bit of that precious pasta water for later.

Lower the flame again. In your now-dry pot of pasta, start to stir in your vegan cheese little by little. I’m also going to stop saying the word vegan every time I say the word cheese/butter/etc, because you get it. Start to mix a generous chunk of butter into your pasta. Add about a cup of unsweetened creamer into the mix too. Add that little bit of pasta water. You want your pasta to be very creamy. Keep adding your cheese until you run out and keep on stirring. Now take those shallots you forgot about and work them into the mix as well. STIR!

Preheat your oven to 315°. After your mac & cheese looks appealing and has the appropriate texture, transfer it into some sort of casserole dish. You’re going to keep it in the oven at a low temperature so it doesn’t lose its creaminess. Add a tablespoon or so of bread crumbs and smoked paprika right onto the top of the mac. Toss that baby in the oven for about 15 minutes and finish off with a quick 3 minute broil.

After that, garnish your mac with green onion and you are good to go.

A little crust on top from the bread crumbs + broil combo, but beneath lies sweet, creamy goodness.

A little crust on top from the bread crumbs + broil combo, but beneath lies sweet, creamy goodness.

Now again, completely optional, I prepared buffalo fried oyster mushrooms as a side exactly the way I did it in the vegan chicken & waffles recipe from a few weeks ago. Click the button below for that.